
Hi all! My name is Leila of @leila.makes. I am a mixed/shelter/wildlife veterinarian, grad student, and sewist! In this blog post I am sharing how to create a Sagebrush Top hack with a cropped waist with ties and fitted sleeve cuffs. Continue reading to find out more.

Introduction:
I absolutely love the name “Sagebrush” because it brings me back to living in southern Utah last year. On cool mornings, before the sun rose and brought the temperature to well over 100F, you could smell sagebrush all around the red dusty landscape and it was such a peaceful and magical moment; that memory will stay with me for a long time. Now after making this top, it will also serve as a reminder of my time in the high desert, surrounded by lovely plants and surroundings.
The sagebrush top has been on my mind for quite some time. I’ve admired some color block and gorgeous gingham versions, but I hadn’t decided what style to make myself until now! Lately, I’ve been loving cropped tops because they go so well with high waisted pants and who doesn’t love the ability to adjust the waist of their clothing especially when eating lots on a night out!
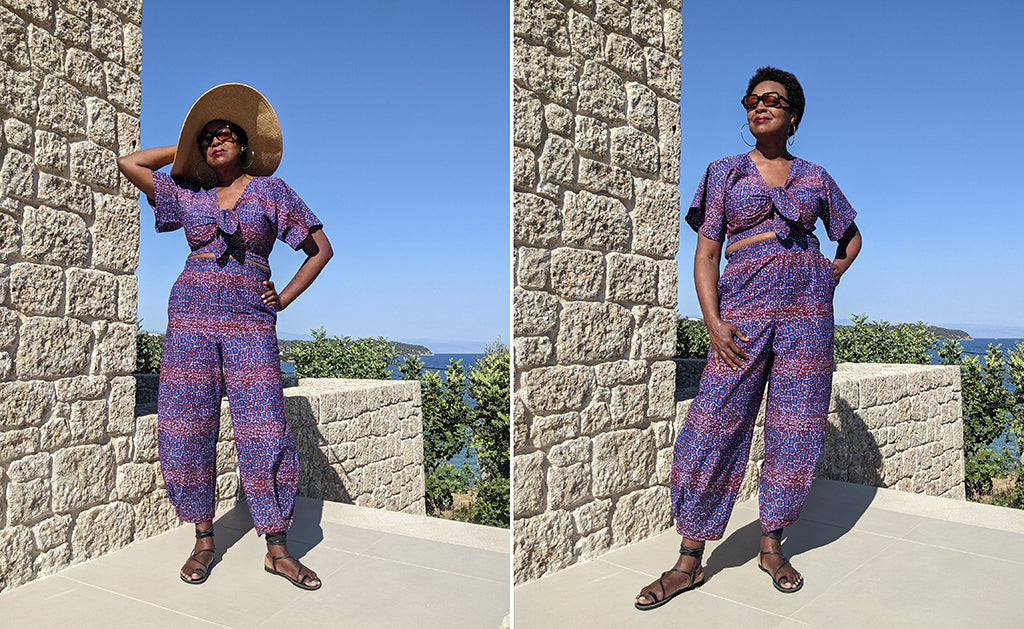
So this hack tutorial is for a cropped sagebrush top with a waist tie and fitted sleeve cuffs – no elastic. According to the size chart, I’ll be making the size XS. My current measurements are: UB 32”, FB 30”, W 25”, H34”, and height 5’3”.
HACKED + ADDITIONAL PATTERN PIECES:


Front Body
- Shorten to desired length by measuring from the top of your shoulder to a couple inches below your natural waist (where you want the cinched bottom hem to fall).
- Lay your front yoke and front body piece on your table and overlap the pieces by the ⅝” seam allowance.
- Take the measurement you just calculated and mark this on your front body piece, starting at the ⅝” seam allowance along the top of the yoke shoulder
- For me, this ended up being 6” from the bottom edge of the original pattern piece.
- Note: it’s better to have too much length and err on the side of caution since the body piece is basically a rectangle so shortening later on won’t affect the fit of your top, just the length!
Back Body:
- Shorten the piece the same amount as you did for the front body piece.
- Do NOT cut on fold, cut 2 pieces and remember to add ⅝” at the original cut on fold line for the seam allowance.
- Make/mark a notch 1.5” from the bottom edge of the back body pieces.

Sleeve:
- Shorten the sleeve by 3” at the length/shorten line (if you want less poof, I can only take so much)
- You won’t need to cut little tabs at the bottom since we’re adding cuffs instead of rolling the hem up, so just cut a straight line from the bottom edge of the sleeve to where the seam meets the armpit
- I want my cuff to be about 1” so the width of the cuff will be 2.5” after accounting for ⅜” seam allowances on either end.
- For the length of the piece, measure around your mid-bicep (where you anticipate the sleeve to fall) then add ⅜” seam allowance on either side (so about 1”) and an additional 1” for ease.
- Make sure this piece comfortably fits over your elbow here (use a soft measuring tape to create a loop of your measurement and fit it over your arm to imagine what the sleeve cuff will be
- Interface the cuff pieces if needed/desired.
- The width of the strap piece is 1.25” and you will use a ¼” seam allowance
- The length of the strap piece will be your waist measurement + 12” (you may want to add a bit more length if your fabric does not stretch out after using a loop turner to pull it right side out
HACK STEPS:
Step 12 - STOP – you need to finish your back body piece first- Place the two back pieces RST and sew with the normal ⅝” seam allowance; stopping 1.5” from the bottom edge (for your tie strap channel later on!)
- Remember to backstitch
- Press seam flat, then fold each side under itself to create a double folded hem edge from top to bottom
- Pin and stitch in place along both sides of the center back seam to finish your seams
- You want the bottom to cinch around your natural waist.
- Put the top on and see when the bottom edge falls.
- You can fold the bottom edge up by 1” and then bring it to your waist and see if the poof is what you want (if too much, shorten the length of the top as needed)
- Account for 1” of the bottom edge being folded up to create your tie strap channel

- Sew cuff piece short ends RST, press seam flat
- Fold cuff in half lengthwise WST and press
- Gather your sleeve end with 2 lines of basting stitches and pull the bobbin threads to fit into the cuff
- Place the cuff over the edge of the sleeve RST and PTSOOI (pin the sh*t out of it)!
- Sew together with ⅜” seam allowance and press seam away from sleeve
- Press the raw end of the cuff inward WST by ⅜” then fold your cuff over and stitch in the ditch to finish the cuff attachment (seam should overlap your first stitch line
- If you don’t want to stitch in the ditch, you can also hand sew in place!

- Fold the strap piece RST and sew with a ¼” seam allowance
- Trim seam allowance as needed
- Use a loop turner to turn the strap right side out
- Don’t forget, we need an opening to feed our strap through the bottom hem
- Remember you left 1.5” unsewn at the bottom of the center back
- Fold your bottom hem up ¼” and press, then fold up ½” and press
- Edgestitch ¼ - ⅛” from the edge, double check that this channel will fit your strap
- Feed your strap through the opening that should be left along the center back of your top with a safety pin
- Put your top on and cinch the bottom hem to your liking and tie


Pat yourself on the back and admire your new hacked sagebrush top!
It's a great hack to add some extra flare to your Sagebrush Top makes. I hope you enjoy making it.
-
See Leila's Instagram here at @leila.makes
Shop the Sagebrush Top here


Leave a comment
This site is protected by hCaptcha and the hCaptcha Privacy Policy and Terms of Service apply.