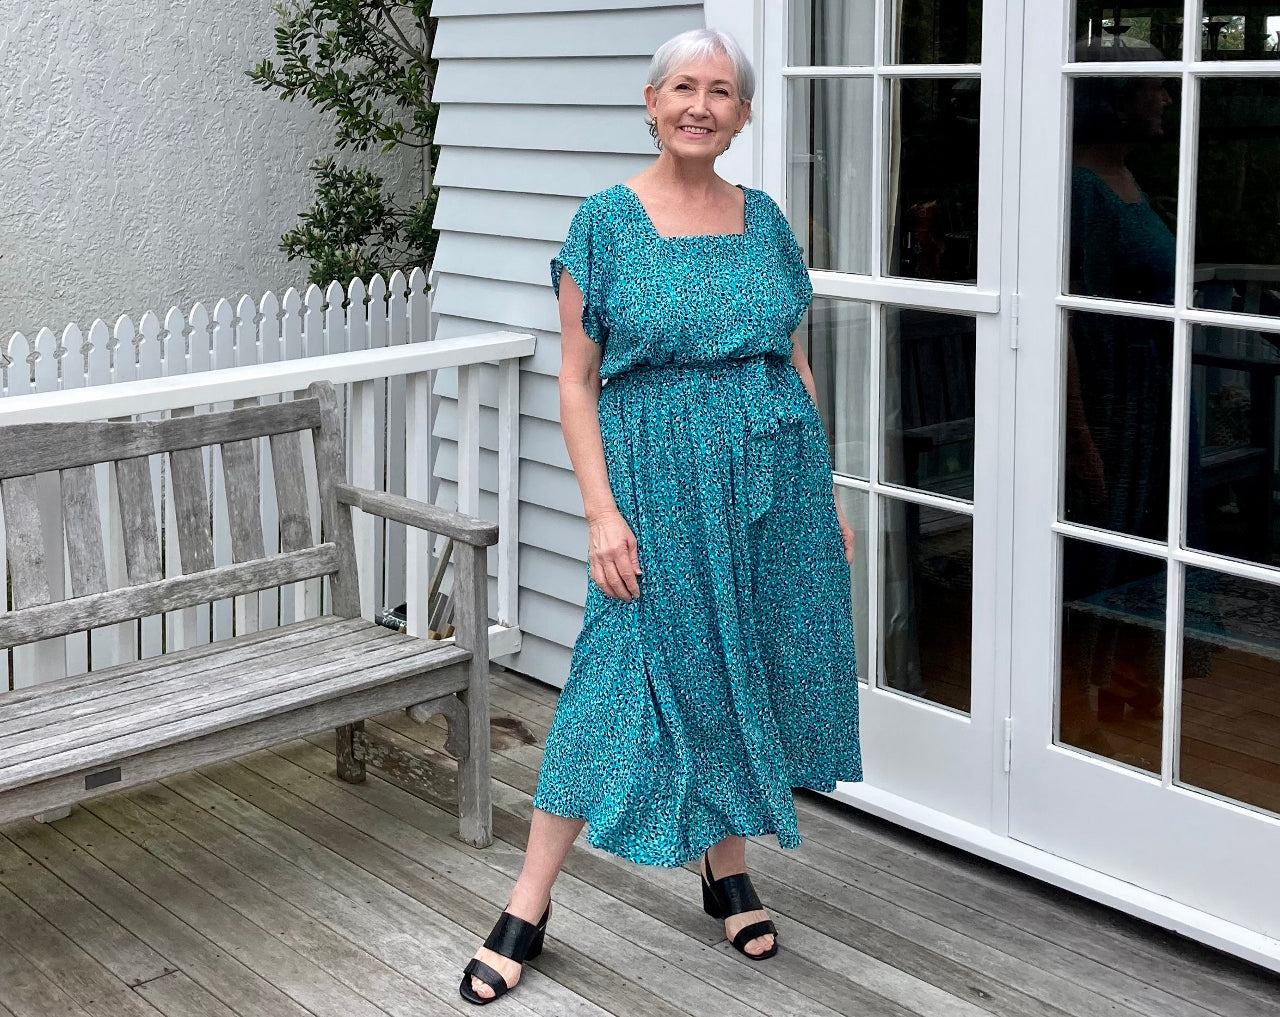
Hi, my name is Jeanette (@netty.hayes.sews). I am really happy to be here on the Friday blog sharing my hack of the square neck top pattern. I love simple and stylish dresses that showcase beautiful fabrics. Having made the square neck top recently, I decided it could easily be turned into a lovely, effortless, pull-over-your-head dress with a beautiful silhouette and endless possibilities in terms of fabrics. Continue reading to see how to create this lovely Square Neck Top Dress.
I wanted lots of drape in my first version and so I opted for a viscose challis. It would also be gorgeous in cotton lawn, cotton poplin, linen, silk, seersucker, double gauze, crepe, tencel. The square neck top front and back are cut on the fold and even though the skirt of my dress version is made in four pieces, there is a lot of volume so the seams tend to disappear. All of this means that your beautiful fabrics can be shown to their absolute best, without breaking up patterns.
Here I walk you through how I made this dress. For reference, I am 164 cm (5’4”) and I made the Square Neck top size M, with a C/D cup. I used 3 metres of fabric and it was 135 cm (53 inches) wide.

- Prepare the top pattern pieces. The only change to the square neck top pattern is to adjust the length of the front and back pattern pieces. Measure to your natural waist and add 4 cm [just over 1½ inches]. That is how long the pattern pieces should be. I took 8 cm (just over 3 inches) off the back and made the front piece the same length. The front piece is curved and you need to straighten it. I traced out my new pieces because I want to make the dress again. The facings do not require any adjustment.

- Draft your skirt pattern. You will be cutting four identical skirt pieces. I made a gentle A-line pattern piece loosely based on a vintage Vogue pattern I have made up a couple of times. That pattern takes masses of fabric and I wanted to fit my dress onto 3 metres - so I made the skirt piece narrower at the hem than the Vogue skirt. You don’t have to worry too much about the width of the skirt at the waist because the skirt gets gathered to fit the top and then elasticated. Just make sure the top of the skirt is wider than the hem of the top – 40% to 60 % wider is great. My skirt pattern piece is 42 cm (16½ inches) across the top, 67 cm (26⅓ inches) across the bottom and 84 cm (33 inches) long. It has a slightly curved hem.

- Cut into your fabric. Cut the Square Neck Top as instructed in the pattern. Cut four skirt pieces.

- Sew the Square Neck Top according to the instructions up to and including step 14. Put a small notch in the centre front hem and centre back hem. This will help you get nice even gathering when you attach the skirt.
- Assemble front and back skirt. Put two skirt pieces right sides together. Sew the right hand sides together to make the front skirt. Do the same with the remaining two skirt pieces to make the back skirt. Overlock (serge) or zig zag the seams together and press to one side. You now have identical front and back skirt sections.

- Gathering stitches. Sew two or three lines of gathering stitches along the top of each skirt section – start about two cm in from each side. I sew three rows of gathering stitches – two within the seam allowance and one outside. This gives a really even gather and you don’t get puckers. I recommend you use a bright contrasting thread so that you can find and pull the gathering stitches out easily when you have finished with them.

- Gather the skirt pieces to about the hem width of the top. You don’t have to be perfect at this stage because you will adjust the gathering when you are pinning the skirt to the top.
- Sew the front skirt to the back skirt at the side seams, right sides together. Avoid catching the gathering stitches in the side seams. Overlock or zig zag the seams together and press to one side.

- Pin the top to the skirt. Right sides together, pin the top to the skirt. Match the side seams of the top and skirt. Match the notches you put in the hem of the top with the centre back and centre front skirt seams. Adjust the gathers so that the top and skirt fit together. You will have slightly more gathering at the back.

- Sew the top to the skirt. This ‘waist seam’ becomes the channel for your elastic and so it needs to be wide enough. I used 1.5 cm wide elastic and sewed a 3 cm seam allowance so that I had enough room to overlock the seam and fit my elastic in. Once you are happy the top and skirt are sewn together evenly, pull out your gathering stitches.

- Create the channel for your elastic. I overlocked the edge of my waist seam. You can do this, or sew another seam 0.5 cm from the edge of your waist seam.


- Have the dress wrong side out. Press the waist seam up and pin it to the top of your dress to create a channel. Sew around the top of the waist seam, making sure that you will have enough width in the channel for your elastic. Leave a gap to insert the elastic.
- Insert elastic. Cut your elastic to suit your waist and thread it through the channel and secure with a safety pin. Try on the dress to make sure the elastic is comfortable. Then sew the ends of the elastic together and close the gap in the waist channel. As an optional step you can create a tie belt with left over fabric.
- Hem your dress and you are all finished!


Leave a comment
This site is protected by hCaptcha and the hCaptcha Privacy Policy and Terms of Service apply.