In this post the talented Roisin from @giveherpockets shares how to create a lino print pattern on fabric by hand and make a beautiful Saltwater Slip dress with square neck hack. Continue reading to find out more.
Inspiration
This year, I began working as a flower farmer and florist part-time, working with constant colour and brushing against so many different shades of green has impacted my sewing practice immensely. I want to be bolder with colour, with shape, with materials and with melding sewing and textile design.
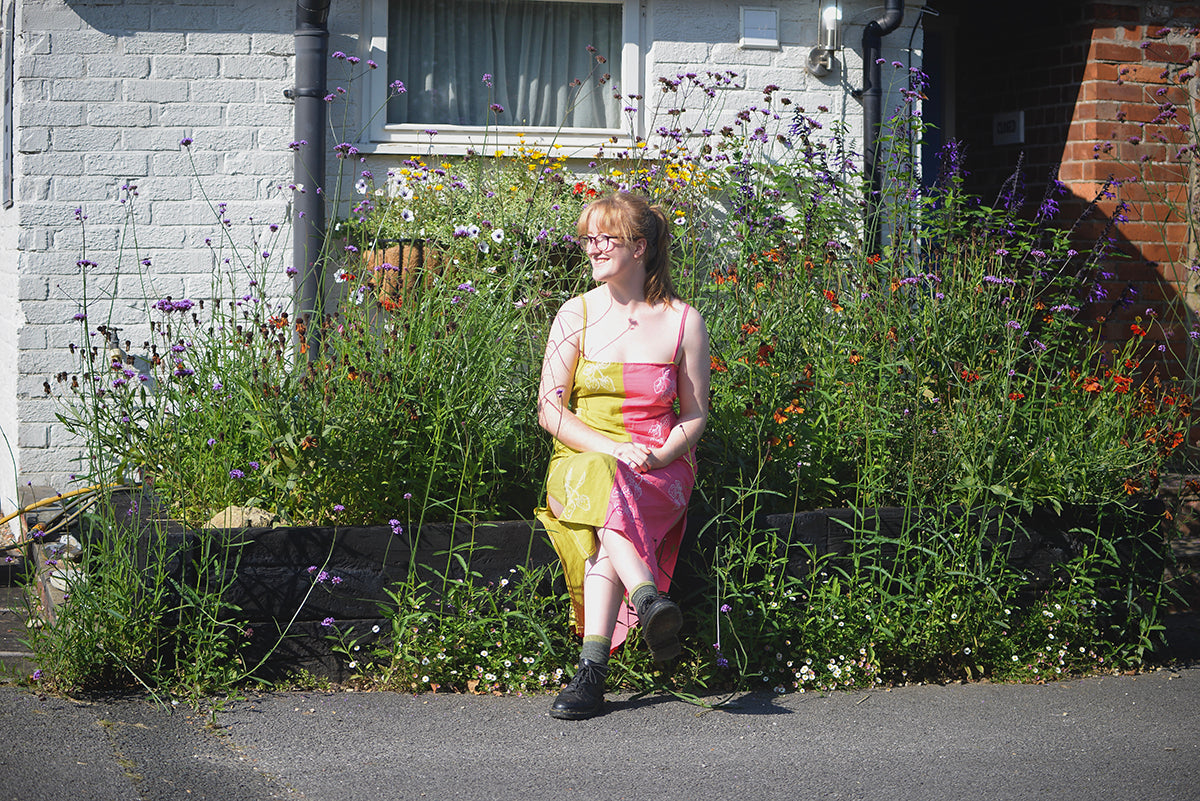
So, for this saltwater slip I wanted to bring in colour and lino-print to make a long-awaited slip dress for my wardrobe, and make it something really joyful and special. I innocently started looking on Pinterest for colour palettes and quickly found myself curating an entire board of green and pink (see below).

It wasn’t until I started sewing the colour blocked fabrics together after printing onto them that I realised my colour palette had been entirely inspired by the elephant hawk moth, I find the more I work amongst nature, the more inspired I am by it - even in these strange unconscious ways.

Tools:
To make your linoprinted saltwater slip, whether it be two tone coloured or not, you’re going to need a few key linoprinting tools. A roller, a plate, lino, some lino-cutters and some kind of fabric block printing ink. I bought all my tools from an art shop local to me except for the ink which I bought online. I have found that Speedball Fabric Block Printing Ink is excellent on fabrics as it has real stay power and good lightfastness. I chose white ink for this dress as I wanted to keep the whole print quite light and summery.

Process:
Before I even touched my inks and linocutters, I pre-washed my fabric (a viscose linen slub from Sister Mintaka) and cut out my pattern. I took quite a bit of time over this to make sure that I would end up with two halves rather than two identical front pieces (two left sides etc). For the front piece, I just ignored the cut on fold instructions and added a 1cm seam allowance down the centre front.
I laid out my four main pieces to ensure that I was printing on the right sides of the fabric (again, I have a fear of making two left sides, as I literally cut out two left feet when making sandals once!) before starting printing.
I took some inspiration images of strawberries and children’s book illustrations, then sketched straight onto the lino with a pencil. You could absolutely do a few sketches before hand to get the perfect print, but I didn’t want this to be too picture perfect - I like that sort of nostalgic children’s illustration style. I begun sketching some big strawberries onto the lino to get the approximate shape and size I wanted, keep in mind that the more detail you put into your Lino the more precise your print will need to be and sometimes with thicker inks like a fabric ink, and with fabrics like slubs or thicker woven fabrics, it can be hard to pic up detail. Knowing this, I tried to keep it quite simple, with bold and sometimes jagged lines that would be picked up by the ink.
Some top safety tips when working with lino, be very careful with the cutters!! These are incredibly sharp so use a cutting mat underneath your piece of lino, do not cut in the direction of your hand or fingers, and take it slow with an even amount of pressure. I would recommend doing some simple line cuttings on lino before you tackle your print so that you can get a good feeling for how much pressure to apply.
Remember that the print you are cutting out is going to be there inked up part, it can feel a bit strange to be cutting out the bit that will not be inked particularly if you are using a dark coloured lino like I was. To get around this mind meld, you can use a lighter colour lino and colour in all the parts you want to cut out, so that all you have left at the end is the print.
Printing:

Make sure to have a think before hand about the sort of arrangement you want on your fabric. If you have a small Lino print, you might want to have lots of repeating prints, but if it is medium/large in size then you might want it to be more spaced out - like mine. I didn’t want the print to detract from the coloured panels, so I went for a nice even spread of prints. You can play around with this by using scrap fabrics you have to test print, I highly recommend ironing your fabric first so that you don’t have any creases that might lead to a mis-print. Test printing on scrap fabric also allows you to see if there are any bits of Lino that still need to be cut away that you might have missed, or whether you need to cut something a bit deeper.
When you’re comfortable with both inking up your Lino print and placing it down on the fabric, its time to start printing! Take your time with this. But remember if it doesn’t come out perfectly (it rarely ever does!) that is ok, it adds to the absolute charm of something you’re wearing.


Final hacks:
You need to wait about 5 days for the ink to ‘cure’ for Speedball fabric inks, but check the instructions for the ink you’ve purchased. After that time it will be completely good to sew up and the ink won’t run when you wash it.
I followed the sewing instructions from here to stitch up my dress, and only made a few small alternations to achieve a more squared off neckline (by folding down the pointed parts of the neckline to achieve a nice line, and also extending the slit in the skirt up a little higher on both sides. As I always do, I just kept pinning and trying it on. The hacking portion of this was really easy because the pattern is such a lovely one to work with - fast and simple with clear directions that make every stage really intuitive.


Styling:

I’ve worn this dress a few times now, and I am already excited to make another one in a plain fabric to layer over a shirt for workwear in the office. It is light and comfortable, as well as incredibly fun and surprisingly easy to style. I have paired it with turtleneck tops, thin jumpers and both boots and sandals depending on the weather, highlighting the pops of colour and using them to shape the rest of the outfit. The print elevates the colour blocked dress in a way that feels reminiscent of something I would wear when I was a child - which I enjoy hugely.
-
See more of Roisin on her Instagram here @giveherpockets & blog here.
Shop the Saltwater Slip Dress Pattern here.


Leave a comment
This site is protected by hCaptcha and the hCaptcha Privacy Policy and Terms of Service apply.