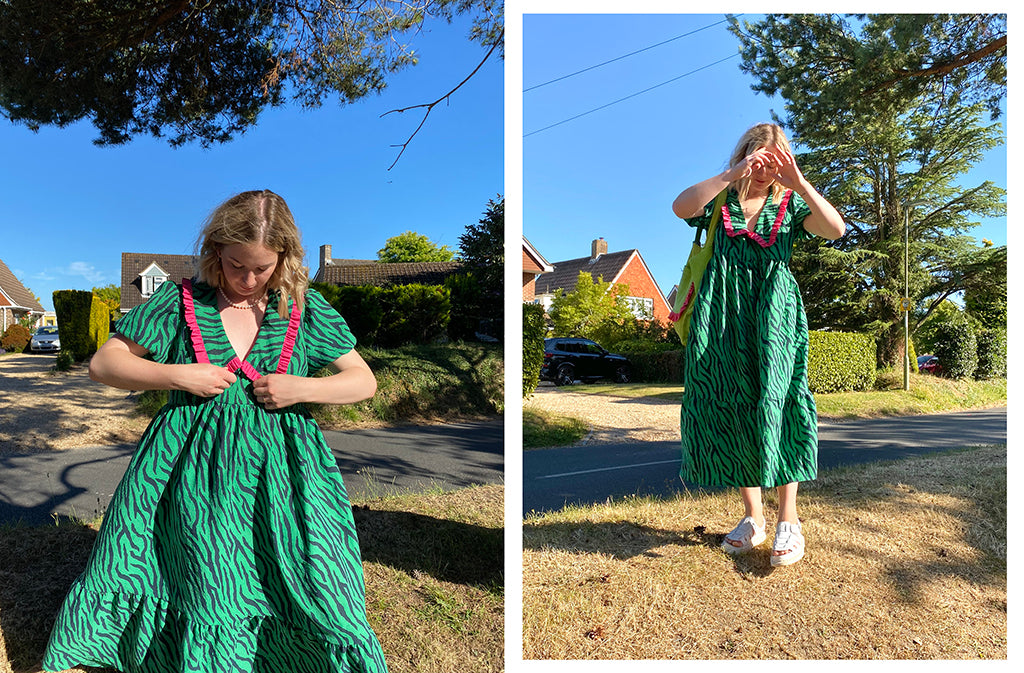
Hey! My name is Bella from the Instagram @bellllagrace and I am a seamstress, illustrator, quilter and content creator! Immediately after I was asked to create a post for Friday, I knew exactly what I wanted to hack… The Patina Blouse pattern. Now, as much as I really like the pattern as it is, I don’t ever wear blouses. However, I’ve seen so many beautiful Patina Blouse versions on Instagram I knew it would be the perfect base for my idea. I’m sure you have all seen the iconic dagger collar-style dress sold by Molby The Label, and so what better pattern base than the Patina. I decided to create my version in a dead stock green and black zebra print tencel modal from Rainbow Fabrics. Continue reading to find out how I created a Patina Blouse dress hack with ruffle collar.


Pattern adjustments:
The Patina is a loose fitting, back gathered shirt, and so it needed to be heavily taken in to make a dress bodice. So, to tackle this, I compared the suggested body measurements to their equivalent finished garment measurements. I decided that I would roughly follow the finished garment measurements instead to reduce the size a little. To make sure that the armholes and neckline were accurate, I still cut out true to my size in those, and then graded to the finished garment sizes down the sides and front. I advise that you go in-between your suggested size and finished garment size so that you allow for the bodice to have a smocked look, unless you are willing to add in a fastening.

To make the back bodice piece I combined the back yoke piece and the back piece. For ease of reference, I have illustrated this (see above). I did this to remove the back gathers that the shirt features, as I thought that it would look exceptionally odd in this style of dress. Once the new back piece was created, I then simply placed it on the fabric fold and cut it out.
Since the pattern has a placket, I did expect to have to take out some cm from the front. However, where the placket is attached to create a seam, it meant that I didn’t need to remove anything, as the placket isn’t an add on to the blouse. Instead, all that had to be done was remove the facing completely, which was easy as a lining needed to be added anyway.
The lining was cut from a fuchsia pink cotton - same as the ruffle. If I had given it some more thought, I could have made the skirt, or sleeves, neatly tuck into the bodice lining by burrito folding it when sewing, but I forgot!

Collar:
To assemble the collar and lining, I first attacked the collar ruffle, which was roughly a 100 cm by 3 inch strip, times by 2.
Attaching the two strips together, and then folding them in half lengthways, I then pinned the ruffles around the circumference of the interfaced collar piece and then attached both collar pieces together. I sewed the collar onto the outer bodice piece while the bodice pieces were still snatched to each other.
The lining bodice pieces had all been sewn together, including the front two pieces. Once the collar was attached to the front outer bodice, I then placed the front bodice pieces together, right-sides together, sewed them shut and then pressed the seam open.
I did this as I had made this style of dress before with no front bodice seam and found that the collar moved around and didn’t have such a strap dagger on the neckline. After completing this, you can then go ahead and pin the lining bodice piece, right-sides together, over the collar and bodice piece like a little sandwich. I understitched the collar to the lining to really stop it from moving around.
Sleeves:
For the sleeves, I cut out the short sleeve option and increased them at the top to create a puff sleeve. I created an elastic casing at the rolled hem to also give them a puff look. This is a fairly simple hack to do to most sleeve patterns if you want to add a puff sleeve effect to your sleeves.

Skirt:
For the skirt, I used two rectangles which were based off many other tiered skirts I have constructed prior. I measured how far down my legs I wanted the first part, and where I wanted the ruffle to end, to gauge the measurement of the length.
The top part of the skirt was 58cm by 50cm, cut on the fold twice, and the lower part of the skirt (the ruffle) was 71cm by 29cm on the fold, times two as seen in the pattern diagram illustration below.
I sewed the two top skirt pieces together along the short ends and finished the raw edge. I then matched the skirt side seam to the sides of the bodice and pinned it into place. I then folded the front and back skirt bits in half, and pinned those to the centre of the front and back pieces. I then continued this all the way around the bodice to create an even gather. Once pinned, I then sewed down and finished the seam. I repeated this step to attach the skirt ruffle, right-sides together, to the main skirt. I finished the skirt with a rolled hem.
For all steps in between the ones I have listed above, simply follow the Patina instructions.


I can’t wait to see your hacked versions of this beautiful pattern; really have fun with the colour and print combinations and number of tiers.
-
Shop the Patina Blouse Pattern here.


Leave a comment
This site is protected by hCaptcha and the hCaptcha Privacy Policy and Terms of Service apply.