Marie @marie_stitchedup is a sewist from the UK. She enjoys making beautiful, comfortable, and practical clothing to suit her lifestyle as a disabled stay at home mum to two children and a cocker spaniel! In this blog post Marie shares how to create a few small changes to the Saguaro Top to give it a front opening and therefore make it easier to get it on and off for anyone who may require that modification. Continue reading to find out more.
Ahh sweet, sweet Saguaro set. As soon as I saw you, I knew you had to be mine. One late spring morning, first brew in my hand, I did my usual Instagram scroll to see a Reel by Paige @PaigeJoannaa debut the Saguaro set in different fabrics. I am not usually one to be easily influenced, but I dutifully clicked through to see which pattern I had missed.
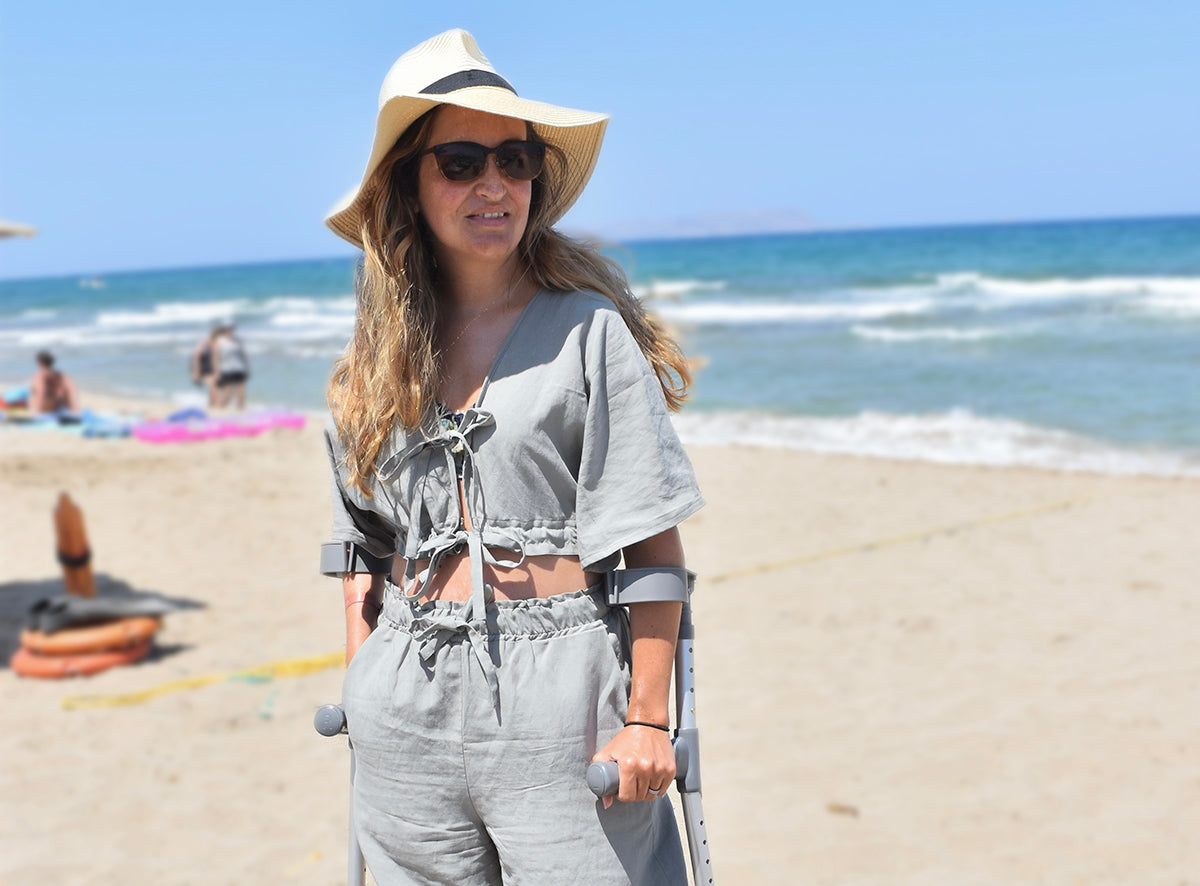
The first set I made was from a beautiful organic linen in the colour Marsala from We Are The Fabric Store in New Zealand. Linen is the perfect summer partnership for this pattern, being a natural, breathable fiber.

I made the size small for the top and a medium for the bottoms, which I feel was a good choice for me. I could maybe have done with a small bust adjustment, but after wearing the top, I didn’t feel that was necessary. There is some extra length in the front of the top, but having a small bust, and including the extra tie, I think that the top falls nicely. I quite like the relaxed look of having some extra fabric to billow over the elastic around the chest. The trousers are a perfect fit for me; again, I didn’t feel that any adjustments were necessary, and they are a comfortable, versatile addition to my wardrobe.
It wasn’t until I tried the final set on, that I realised, that in its current design, the top wasn’t quite as practical for me as I had initially thought. I know this will not be the case for most wearers, but having an elasticated finish to the top, meant that I couldn’t dress or undress independently.
The elastic band needs to be small and tight enough to draw the fabric in and make it sit against the lower rib cage. This means that you ideally need to be able to reach both arms up to get the top over your head. Some people may be able to step into through the top and pull it up, but my hip size is too large compared to my under bust, therefore that is not an option for me.
Luckily, the neckline is nice and wide, so I can still get this top on and off, just with some additional help.
One of the joys of sewing my own clothes is that I can make small changes to the practicality of clothes, while retaining the integrity of the original design.
I already knew that I wanted to make a second set for my upcoming holiday. This was a good opportunity to think about what changes could be made to the top, so that I could wear the Saguaro set on my own terms and help with the accessibility of getting it on and off.
Changes:
The second set is made from a Lyocell Tencel Linen twill, (available from Pigeon Wishes,) which is another great option for the heat. I decided to make this into a short set that I could use as a pool/beach cover up, and this worked well for sunny lunchtimes.
The following adaptions are made on the basis that I am happy with the current length/size of the top.
- Take the front and back bodice pieces, (A & B) and extend them lengthwise by the amount of the top waistband (piece C), subtracting the seam allowance. For size medium, this is 11cm. For ease, I used washi tape to overlap piece C to the main bodice by 1.5cm.

2 ). Add notches where the bottom of pieces A and B used to finish.
3) Check the side seams of pieces A & B are the same length, by walking them over one another, matching the side seam notches.

4) Lengthen the bias binding pieces to account for the new, longer front neckline. (I lengthened by an additional 15cm so there was room for error!)
5) We need to make a drawstring long enough to go around your ribs as well as tie a secure bow. To do this I took the front tie pattern piece and cut an additional piece the same width (short end). I used the full width of fabric for the length. You may need to piece 2 together if you want it longer.

6). Follow the normal instructions to step 14.
7) Here you need to finish the bottom edge of the top according to your preference.
8) Prepare the additional drawstring in the same manner as instructed for the tie closures, but this time fold both short ends in to finish.

9) Fold up the bottom edge of the top, wrong sides together by 1cm, press.
10) Fold up again by 5cm (2”); press.
11) Topstitch in place at 1.25cm and 2.5cm (1/2” and 1”) with two lines to create a channel for your drawstring.

12) Optional; I edge stitched a line at the very bottom. This is purely an aesthetic choice and not functional.
12) Take your additional drawstring and feed it through the newly made channel. Simply adding a safety pin to one end will help it along its way.


There you have it! A completely front opening Saguaro top, with some simple additional steps.
Follow Marie on Instagram here
Shop the Saguaro Set here


Leave a comment
This site is protected by hCaptcha and the hCaptcha Privacy Policy and Terms of Service apply.