This guest post was written by Mijke of @sewitcurly
You can shop the Square Neck Top here.
----
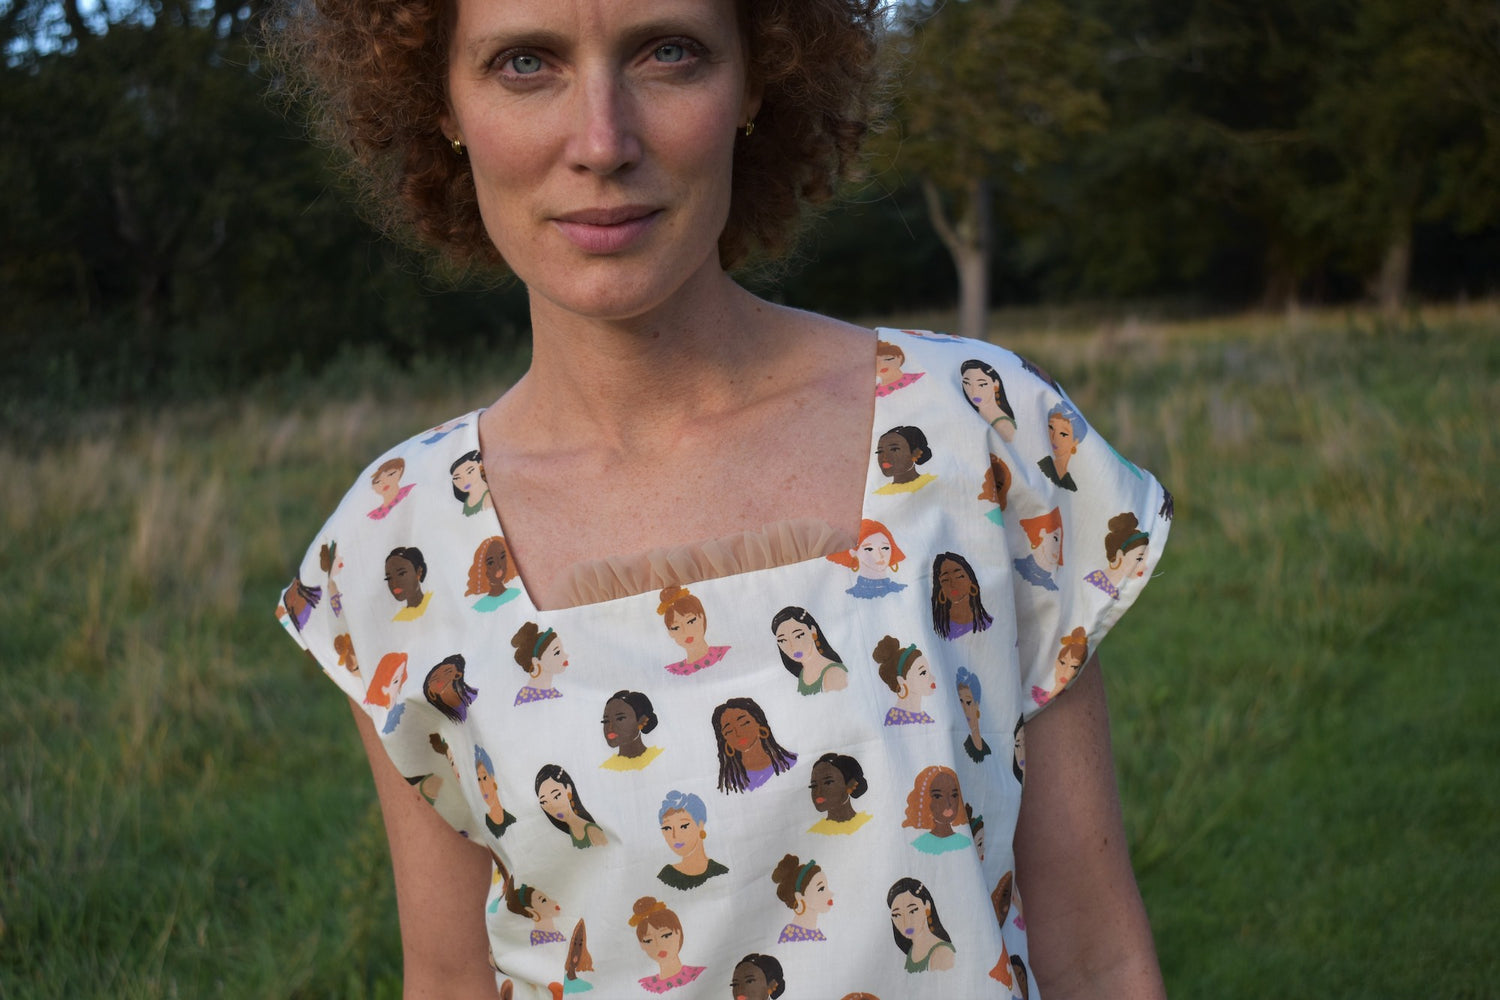
Hello, I am Mijke from @sewitcurly and I very happy to present my Square Neck top here on the Friday Pattern Co. blog.
The pattern has been recently updated and I was so very glad to see Chelsea had added two cup sizes for her woven version. As I am very small around the bust, I always do a small bust adjustment, but this time there was no need! Yay!
I chosen to make the size small, but in hindsight XS would have been better.

As a cute addition to this pattern I have made a small ruffle inside the neckline.

I will tell and show you how I achieved this look.
I followed the instructions right up until no. 7 and then I added the ruffle.
Firstly, I checked the finished width of the neckline on the chart in the instructions. This is also a feature of the pattern that I love. This way you can check if you like the width and height of the neckline.
To calculate the pattern piece you need for the ruffle I doubled the neckline width. And added 2 cm extra for seam allowance. This number will be the width of your ruffle piece.
I wanted the height of my ruffle to be 2cm, but you can make it more or less, depending on the style that you are going for. In my case I multiplied 2 times 2, plus 2 cm for seam allowance. This number will be the height of your ruffle piece.
I chose tulle for my ruffle, but this will work with any light weight fabric.

After I cut out my rectangle shaped ruffle piece, I rounded the ends equally.

Then I folded my ruffle piece double length wise, with the rounded raw edges on top of each other.
I then stitched two rows of gather stitches (the largest stitch length setting on your machine). One close to the raw edges and another row about a centimeter from the first one.
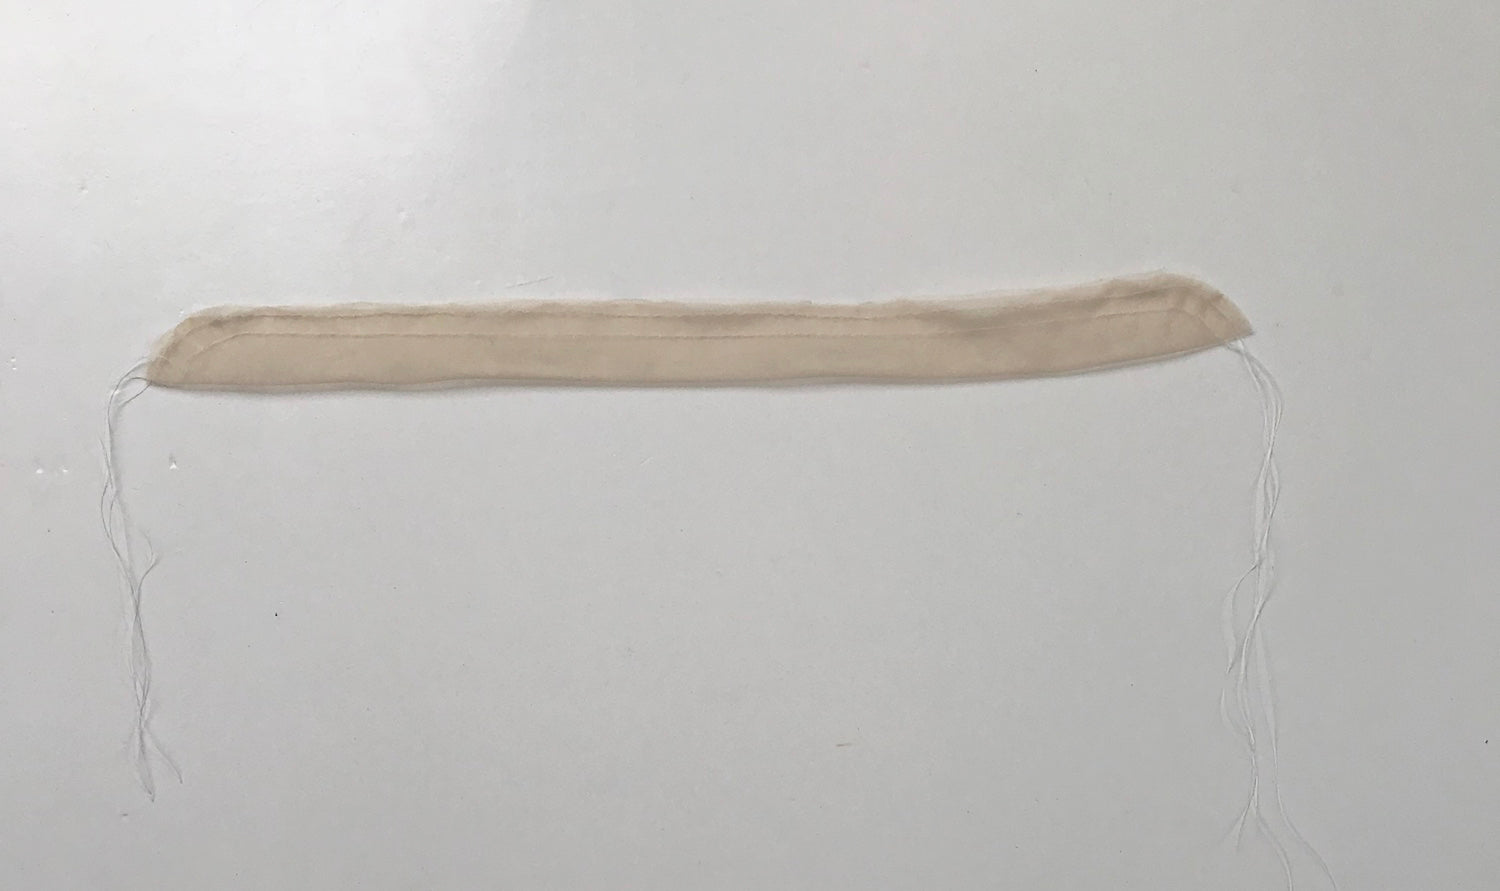
I pulled my top threads to gather.

Now I very carefully evened out the gathers to match the length with the length of the neckline.

I pinned the ruffle to the front of the neckline. I marked the corners of the neckline without the seam allowance to be able to pin the ruffle to the exact right spot in the corner of the square neckline.
You can see that on the picture below.

Then I went back to the instructions and followed them from step 8 onwards.
Only adding grading the seams right after step 8.
Because of the added ruffle the seam will get bulky, so I clipped away the seam allowance of the ruffle and the neckline of the front and back bodice. Leaving the facing as is and just clipped the corners of the seam allowance of the facing.
You can see that on the picture below.

And here it is! A cute little ruffle added to the neckline.

I really enjoyed sewing the Square Neck Top. Because the top is fairly simple, I chose a fabric with a more distinct print and I am loving it!


Leave a comment
This site is protected by hCaptcha and the hCaptcha Privacy Policy and Terms of Service apply.