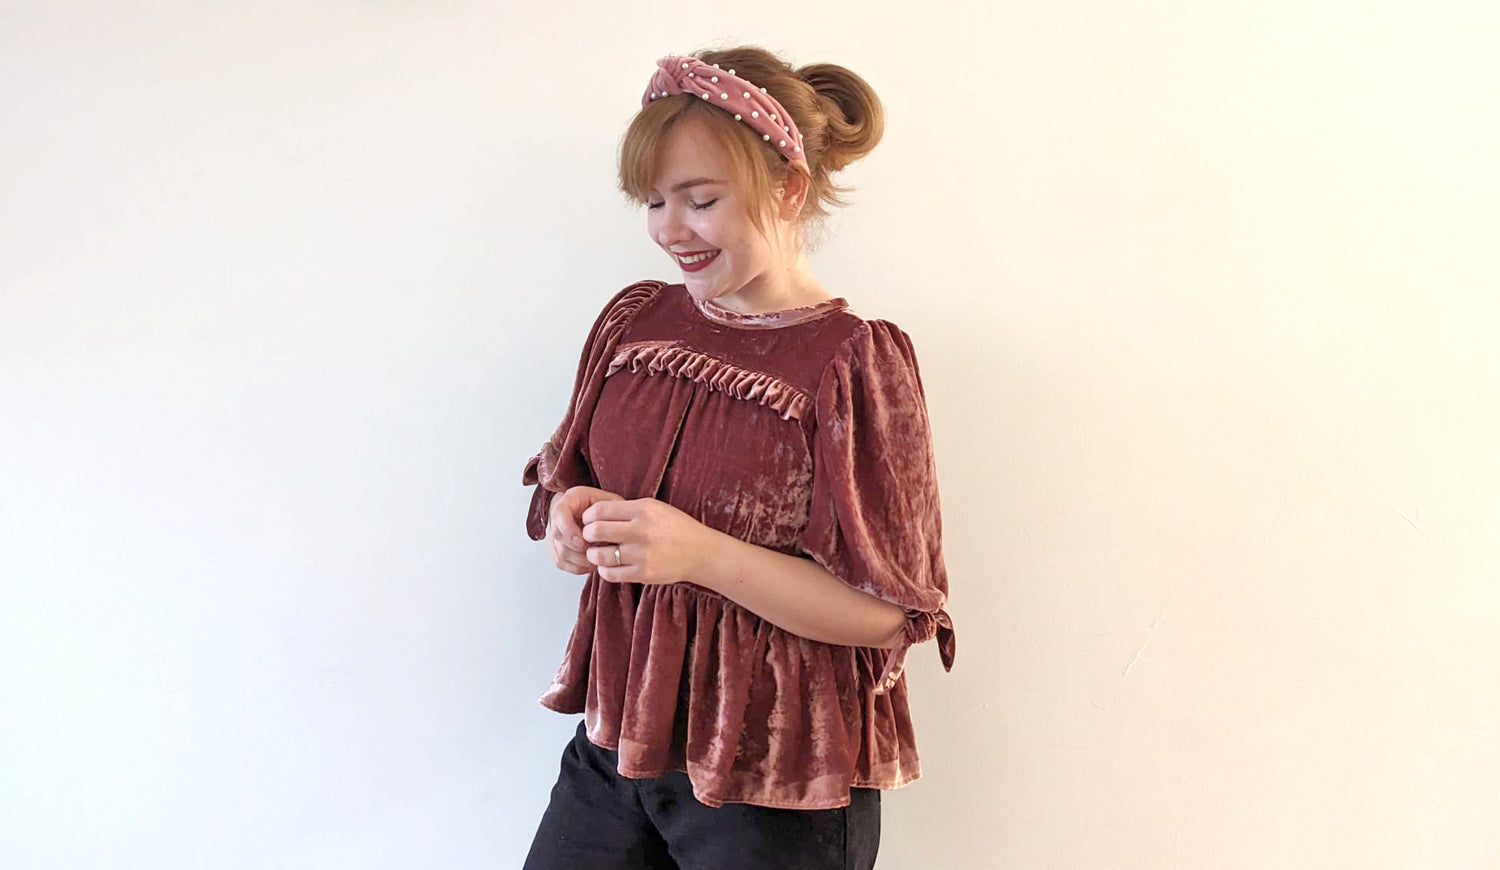
This time of year always makes me want to dress in pretty velvet fabrics whether it's for a party or a cosy festive day at home with friends. There is something so charming and romantic about velvet that I always love. When I saw this pink velvet fabric from Rainbow Fabrics Kilburn I knew I had to create something cute for the holidays. In this blog post I talk in detail about making the Sagebrush Top pattern, with the addition of a peplum style waist and sleeve bows.
Inspiration:


I had gathered inspiration from various ready-to-wear retail stores including Anthropology, Oliver Bonas, and River Island and I kept seeing gorgeous velvet tops with big sleeves and gathers or ruffles. When deciding on a pattern to try recreate the look I settled on the Sagebrush Top because of the big sleeve and ruffle detail on the front yolk. I knew I could add some really simple changes and additions to create the style I liked.
I picked up this gorgeous pink velvet fabric from Rainbow Fabrics Kilburn, and it does have a slight stretch to it. Sewing it with the stretch was a little challenging as the Sagebrush pattern is designed for woven fabrics. I was careful to place the pattern pieces on the velvet so that the direction of the stretch wouldn't be on a long stitch and also so the velvet direction was downwards, so when you wear it it isn't rough to touch!
Pattern Pieces & Amendments:
For this hack, it's extremely simple to do! All you need is:
- an additional X2 rectangle pieces for the peplum, which is X2 the width of the top hem, cut at the waist. (see illustration below).
- X2 rectangle pieces for your sleeve bows. Mine measured: 5X12 inches.

Adding the Peplum Waist:
Follow the usual pattern instructions until you reach the part where you need to hem the top. Adding a 'peplum' style base to your top is really easy!
- Sew together your 2 rectangle pieces, right sides together at the short side seams using the 5/8" seam allowance and then finish your seams.
- Add 2 rows of gathering stitches to each rectangle panel, at the top on the longest length (see illustration below).

- Match up your rectangle side seams with the top waist side seams, right sides together, and pull the gathering stitches until the rectangle seam fits perfectly against the waist seam. Pin in place and stitch all the way around. Finish the seam.
- Hem the peplum rectangle piece the same way you would hem the top, in the instructions. I decided to do a smaller 1/4 inch hem because of the bulky fabric.
Adding the Sleeve Bows:
- Fold one of the rectangle pieces right sides together across the longer edge, press and pin in place.
- Stitch round the 3 raw edges starting at the small fold, pivot and then sew down the long edge. Stop and back track, leave an inch gap, then start again and sew all the way around. See the illustration below.

- Clip corners and then turn your rectangle through the open hole. Press and sew the hole shut by hand or on your machine.
- Fold in half, find your central point and pop a pin where that is.
 - On the sewing machine, tuck and gather your central point to create a bow like effect. Do this by putting your needle at the top of the central point and push the fabric under the feed dogs to gather it. Sew in place.
- Repeat with the second bow.
- Pin your bow onto the center of your sleeve hem and hand stitch it on.
- Leave to hang down or tie in a little knot like I have for a smaller bow.

The Finished Top!


And here is the finished top! The Sagebrush Top Pattern always comes together super quickly and these additions are really easy as well, overall it's very beginner friendly project. I love how it turned out, it has all the romantic drama I wanted but is also super wearable for a casual Christmas day and NYE, as well as dressing up for parties.
Share your version with us on social media with the hashtag #SagebrushTop
Shop the Sagebrush Top Pattern here.
Follow us on Instagram.
& lastly, check out more of my makes here.


Leave a comment
This site is protected by hCaptcha and the hCaptcha Privacy Policy and Terms of Service apply.