In this blog post Preya shows how to create a Saguaro Set top with waist band widening fit adjustment and a skirt using the Saguaro Pants waist band with rectangle skirt panels. Continue reading to find out more.
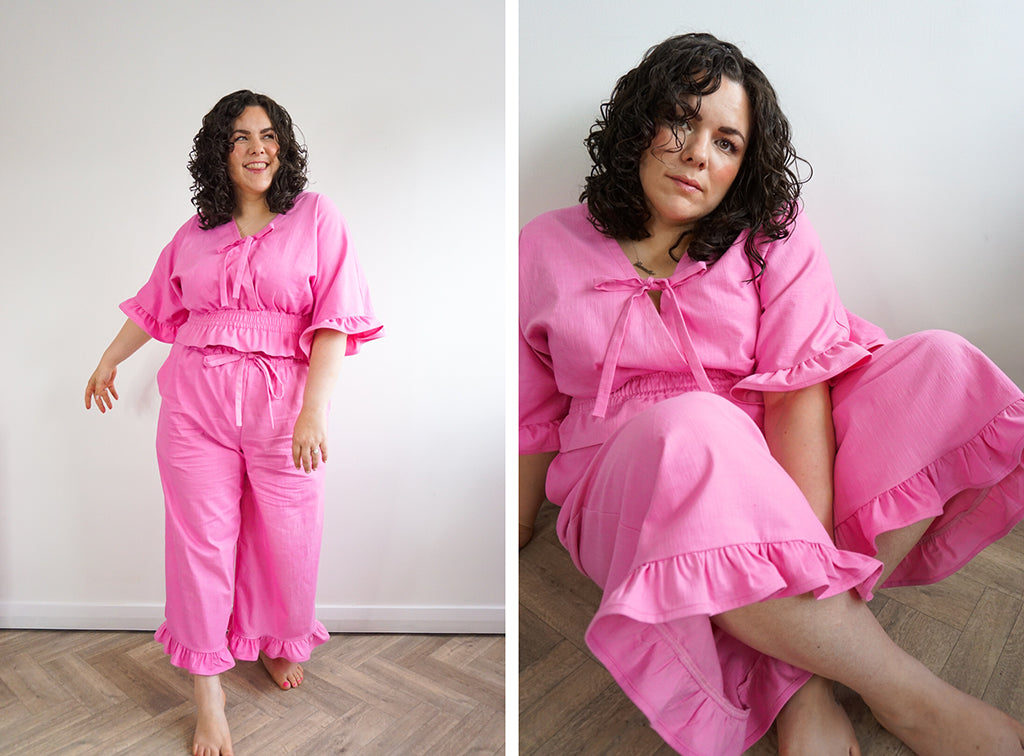
As soon as the Saguaro Set was released I wanted to make it for summer. I loved the cropped top with its cute little tie front. I did wonder how much coverage it would give me as I have an ample decolletage! And, whilst I love the relaxed look of the bottoms, I don’t wear trousers very often. So I decided to create my own hacked version with a long tiered maxi skirt in a linen/viscose floral print.


*photographed is the first set I made
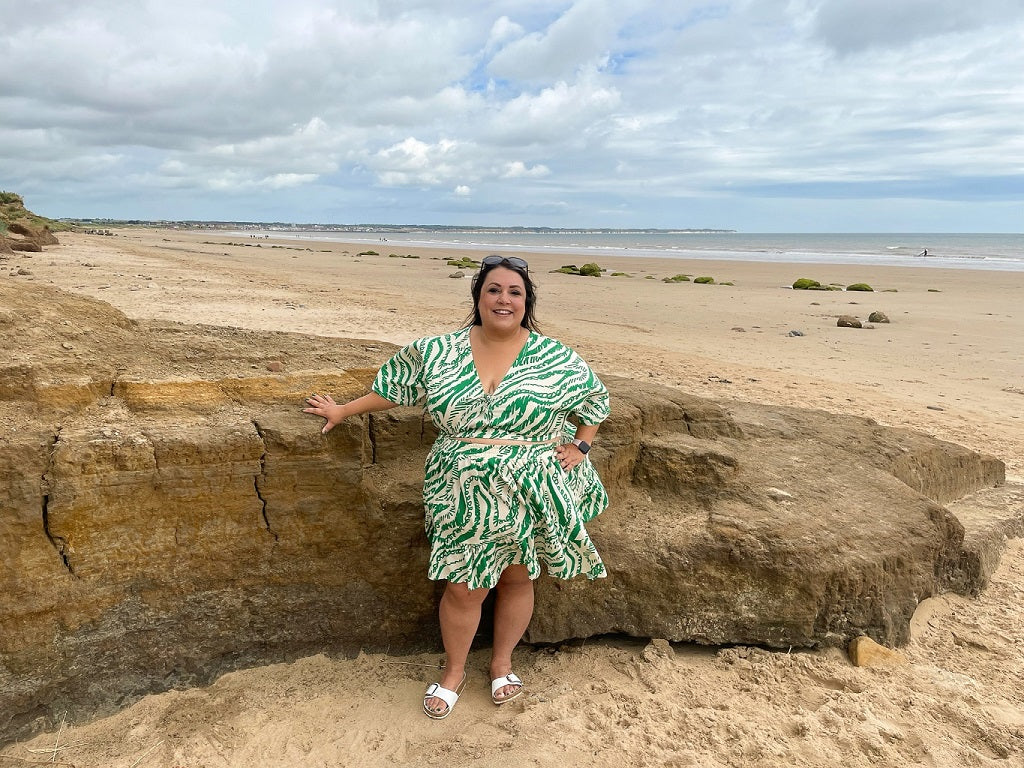
Then I started to think about making another set, this time with a short skirt. I wanted to make it from a light floaty fabric that I could wear on my holiday with a bikini underneath. I decided to use a deadstock viscose challis that had been living in my stash and was just perfect for the job!
Pattern adjustments:
I made the same adjustments to the top as my floral set, I widened the front piece by 2”. It was really easy to do this, all of the instructions are on the Friday website. Basically what you need to do is find the center point of the waist seam, draw a line up to the top, cut almost to the top, and then spread the pattern as wide as you want and tape some paper behind to create your new pattern piece. I then sewed the top up following the instructions.


Sizing the skirt
To make the skirt I used the waistband of the bottoms because I wanted to keep the consistent look of the deep elasticated band. Next I set about cutting rectangles for my skirt. It’s entirely up to you how long to make your skirt. This is what I landed on after having made lots of tiered skirts and dresses recently.

The first thing to decide is how long you want your skirt to be. I was going for a 20” skirt - including waistband. The waistband is 2” deep, so this meant that I needed the tiers to be around 18” long in total. I divided this up and gave myself a depth of 12”, plus seam allowance (⅝” at the top and bottom = 1.2”), meaning 13.2” total. For the second tier I did a 6” depth plus seam allowance (1.2”), totalling 7.2”.
The width to the tiers are based on your waist measurement:
Tier 1 = 2 x (waist measurement) x 13.2”
Tier 2 = 4 x (waist measurement) x 7.2”
I don’t bother adding seam allowance to the width of the tiers because there’s so much fabric an extra inch or two makes very little difference in my opinion.
Sewing the skirt
The skirt is a fairly simple construction. First of all prepare your waistband pieces as per the Saguaro instructions, you won’t need an opening for a drawstring so don’t cut any buttonholes.
Then sew the short side pieces of tier 1 together (finish seams in your preferred way). Sew two lines of gathering stitches around the top of your piece, I do these with a 4.5mm stitch length. Then match up the raw edges of your waistband and tier 1, right sides together and begin gathering - to do this you pull on the loose ends of your gathering stitches, making sure you distribute the gathers evenly.


Once you’re happy with your gathers you can sew the waistband on, leaving a 2” gap so that you can insert your elastic and then close up the gap. Follow the Saguaro instructions for inserting and sewing down the elastic.


The final tier is pretty much the same, except twice as big. I’d recommend settling in a comfy chair with a drink to do this one as it does take time, I promise it’s worth it! Once your skirt is on, give it a hem, a press and a twirl!!


I can’t wait to see your hacked versions of this set, you can really have fun with the tiers, add longer ones or bigger ruffles or play about with the depth of each one. There really are no rules - that’s the beauty of sewing and pattern hacking, you can do whatever you want!
-
Check out Preya on Instagram here.
Shop the Saguaro Set pattern here.


Leave a comment
This site is protected by hCaptcha and the hCaptcha Privacy Policy and Terms of Service apply.