Welcome back to the Friday blog! Since launching the Donny Shirt, we have had a flurry of messages asking for some sewing hacks to turn it into a dress! The good news is it's super easy to achieve and in this post we're showing how to combine the Donny Shirt and Davenport Dress skirt pieces together to create a dreamy collared dress with tie up waist. Another fun addition to the Donny Shirt can be trim, lace or detailing to the collar; We added ricrac ribbon into the collar to create a scallop edging effect. Continue reading to find out more.
What you need:
This hack requires both the Donny Shirt pattern and the Davenport Dress Pattern. If you don't have the Davenport Dress but want to achieve a Donny dress, then don't worry we have other sewing hacks coming soon, or you can still use the instructions in this post with the measurement of the Donny shirt hem (more on that later).
- Donny Shirt Pattern
- Davenport Dress Pattern
- Fabric: this make was made using 2 meters of the Fabric Godmother Linen, purchased from Eternal Maker. You may need more then 2 meters if you want a longer length, depending on your size, and if your fabric is narrow or has a directional print - so bare that in mind. For reference I made a size medium, and the fabric was 140cm wide.
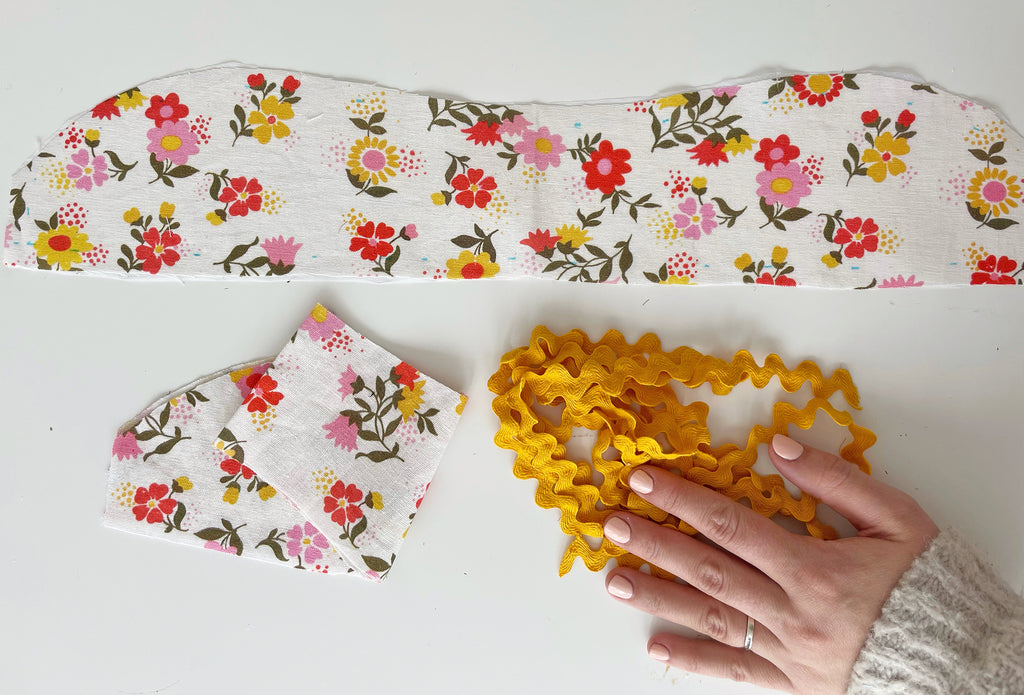
- Ricrac ribbon, about 1 meter.
- Usual sewing equipment & everything else detailed in the pattern instructions (like interfacing)
Pattern hack / Prep:
The hack itself is actually very minimal! Because we're merging 2 Friday Patterns together, they actually nearly fit perfectly which was such a fun thing to discover!
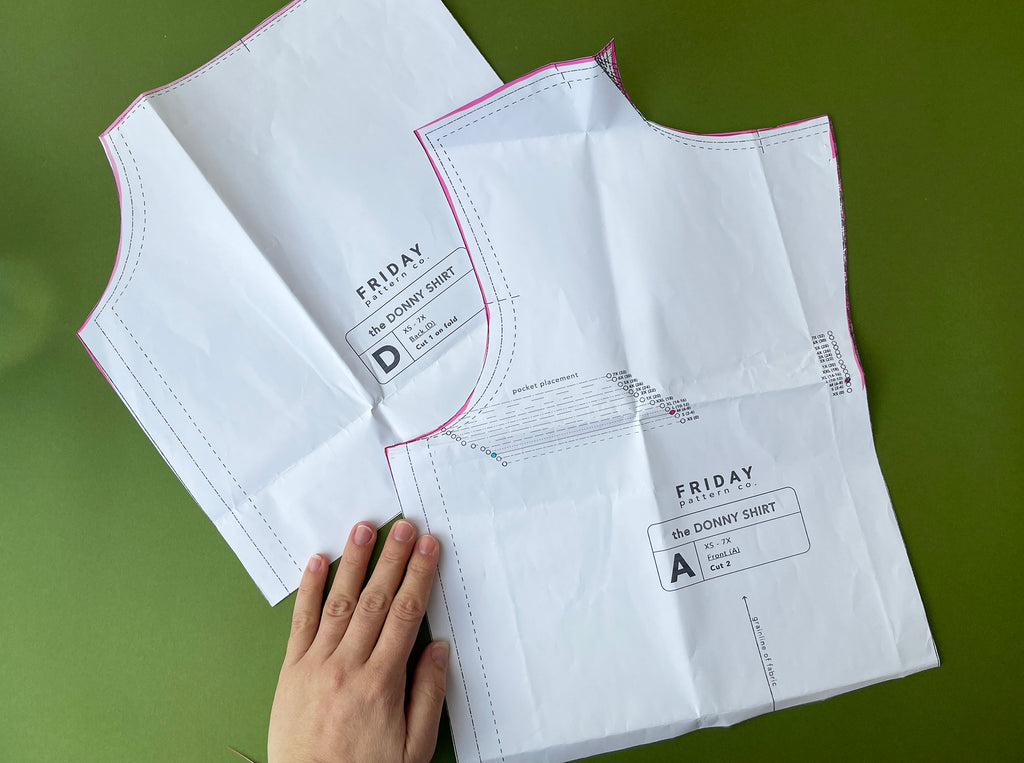
Firstly, cut out your top pieces front and back for the Donny, and they need to be shortened just above the line for shortening and lengthening. I have quite a short torso, so I went 1 inch above the line and cut off the excess there.
You can hold the pattern piece up to your body to determine where you need to cut, by marking where your natural waist is and allowing a 1cm seam allowance.
The next process is preparing the Davenport Skirt pieces, if you're wanting to maintain the pocket, you can simply cut them out as they come and add a small amount to the pocket facing and back piece side seams. For this make I added 4 inches to the length of the skirt, because there isn't the bottom skirt tier, you want to make sure to add as much length as you need. Next time I'll probably add. inches to sit more on my knee.
As shown in the images above, lay your davenport skirt piece flat, up against the hem of the Donny shirt to check the fit, they should almost match up but if not, measure how much excess you need to add.
The version is made without the pocket, so had to add extra to the side front piece of the skirt like shown. You can draw this directly onto your fabric or tape on a piece of paper and draw the extra piece you need, slightly curving the side seam to grade it.
Cut out the drawstring casing L and K as normal, as well as the drawstring pattern piece.
Adding RicRac edging to the collar:
Adding ricrac ribbon to the collar creates this really beautiful scallop effect trim to the edge. The way to sew this in is to pin the ricrac around the edge of your collar outer edge, pinning it central to the seam allowance 1cm in.
Do a baste stitch around the ricrac, just before the 1cm seam allowance.
To make sure the ricrac design is within the full collar, you also need to add this on the front facing pieces like in the photo above, from the notch on the neckline, round to the notch on the center front.
Baste this in place after step 13 in the Donny Instructions, and then this get's stitched in during step 14, when you sew the facing to the main body.
*Step 13 photographed above
*Step 14 photographed above, this is the step you will have the ricrac trim already basted inside.
Once the ricrac is sewn in, it should look like scallop edging once it's turned right side out. It's super cute!
Sewing the Donny Shirt & Davenport Dress:
Sewing the top half and bottom half is exactly the same process as in the Davenport instructions; follow the written instructions for both the Donny shirt, and Davenport Skirt. The top and bottom then get pinned together once the drawstring casing is attached to the skirt.
Insert the drawstring into the waist and once thats done, try it on and make sure you're happy with the length, hem up the skirt and thats it! You have a fancy Donny Shirt Davenport Dress mash up!
If you create this hack, make sure to share on Instagram with the hashtag #DonnyShirt


Leave a comment
This site is protected by hCaptcha and the hCaptcha Privacy Policy and Terms of Service apply.