Hello! My name is Cassie -- I’m a sustainable fashion copywriter and sewing content creator from Toronto, Canada. Living in a country with 4 proper seasons, (3 of which are on the chilly to freezing end of the scale), I try to make versatile garments that can be worn most of the year and contribute to a fun, but cohesive me-made wardrobe! You can find me on Instagram, TikTok, and YouTube where I share more about this handmade journey. In this blog post I wanted to share a Wilder Gown hack, perfect for the colder seasons. Continue reading to find out more.

A Winter-Ready Wilder
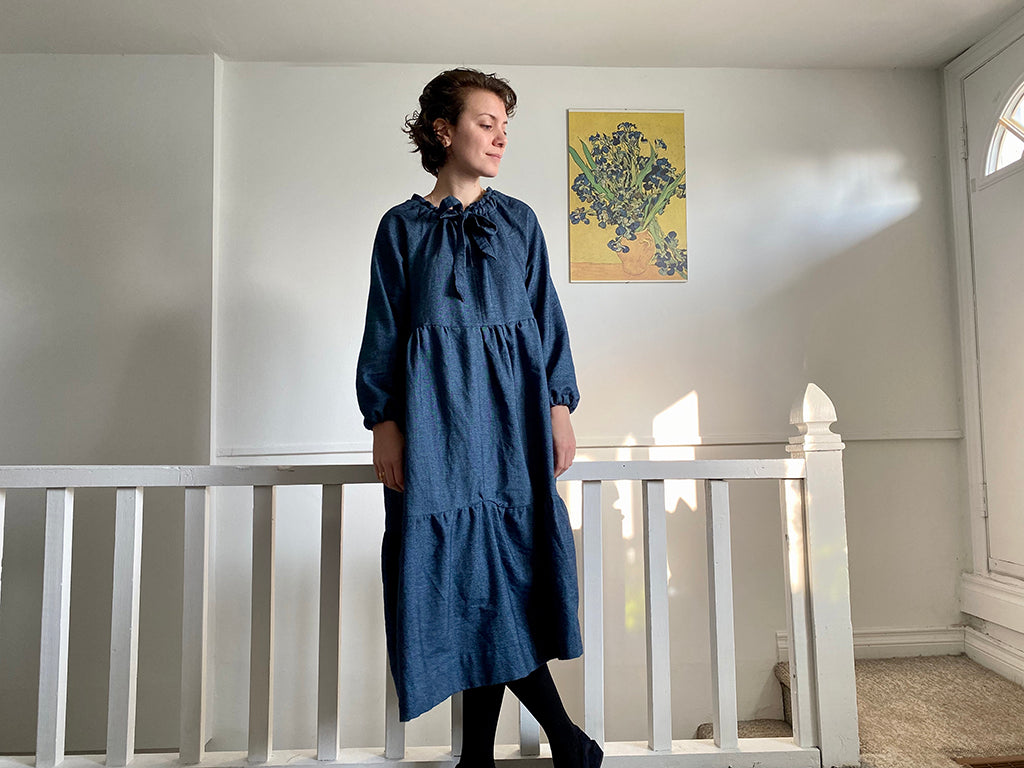
Since it launched, I’ve seen so many wonderful iterations of the Wilder Gown but wasn’t quite sure how it would fit into my wardrobe. When I was finally ready to dive into sewing the pattern, it was quite late in the season to make a summer dress. Instead, I searched for a heavier fabric to make the coziest blanket dress to hibernate in throughout the upcoming colder months.
My first choice was a tried and true fabric perfect for Northern winters. Flannel.
When I spotted this one (it looks just like chambray but is ultra soft!), I knew it was the one.
Modifications
I decided to let the fabric be the main feature of the dress without adding too many modifications. The changes that I did make were for the purpose of making this dress a little more cold-weather friendly. Ultimately, this is what I decided on:
- Inseam pockets with self-fabric
- Elongated arm length to add an elastic cuff
- Shortened the dress by 4 inches

Inseam pockets
Because this fabric is so cozy, I thought that adding inseam pockets in the same material would be a nice touch; no one likes chilly hands!
To do this, I traced around a pocket from a dress I had at home. You can do the same, or use an existing pocket pattern from a different project. Chelsea has a pocket tutorial in the Davenport sew-along if you would prefer to follow those instructions!

I cut out four pocket pieces and placed them right sides together on either end of my first tier skirt panels, three inches from the top. This step comes before you sew the panels together. Do the same thing on both rectangles, so that you have two panels with a pocket on the left and right sides.
Stitch the pockets into place, and then finish the outer edges. Press the seam allowance towards the pocket and edge stitch through all layers. Repeat for all pockets.

Next, you will sew the panels right sides together as per the original instructions, but with two changes. Make sure the pockets are layed right sides together on either side of the panels, and pin together. You will then stitch along the side seams, but instead of stitching straight down, you will stitch to about a half inch down where the pocket is attached, continue sewing around the pockets, and continue down the sides. Repeat on the other side. You now have cozy pockets!

Gathering the skirt
If your fabric can handle it, follow the pattern instructions for gathering the skirt panels. My fabric was too heavy for this method, so I used my personal favourite way for gathering on thick fabric.

Set your machine to as wide a zig zag stitch as it can go (I set mine to 5). Then take a piece of string, yarn, or embroidery floss and hold or pin it at your seam allowance. Zig zag on either side of the floss, careful not to catch it as you sew. I place the floss right at the center of my presser foot and that tends to work well for me. When the floss is secured, continue following the pattern instructions for the skirt.
Elasticated cuffs
One of the worst parts of winter (for me personally) is when the chill creeps up under loose sleeves. To combat this, I lengthened the sleeves and cut 2 pieces of ¼ inch braided elastic with the same circumference of how tight I like a bracelet to be. You can adjust this based on what is comfiest for you.

I followed the same instructions for hemming the sleeves, but slightly increased the hem to accommodate my elastic. I left a 2 inch gap in the sleeve hem to insert the elastic with a safety pin, fed the elastic through, sewed both elastic ends together, and then closed up the gap.
Final Results: Walking in a Winter Wilder Gown
I put this dress on as soon as I gave it a final press, and I haven’t wanted to take it off since. It feels like wearing a blanket, and is comfy enough to lounge around in while also nice enough to wear outside.

Speaking of the outside. Remember when I said I shortened the length by 4 inches? I definitely didn’t need to, but the main reason was because my longest winter coat is quite a bit shorter than the original length of this dress, and I wanted to be able to wear them together without it looking too silly. Pure aesthetics, but I think I do prefer the shorter hem on me (I’m 5”3/ 163cm).


Thank you so much for reading about my Winter Wilder. I cannot wait to make this pattern again for the summer time, but I’m perfectly content to wear this one until then.
-
Shop the Wilder Gown pattern here
Check out Cassie on Instagram


Leave a comment
This site is protected by hCaptcha and the hCaptcha Privacy Policy and Terms of Service apply.