This post is the final installment in the Sagebrush Sew Along! We will go over inserting the sleeves and hemming the top.
First we will add gathering stitches to our sleeve. Using a long straight stitch (recommended length 3.5-4 mm), stitch 1/4” (.6 cm) from the raw edge of your fabric between the outer notches on your sleeve. Sew a second line of gathering stitches 1/4" (.6cm) from the last row. Make sure to not backstitch and leave the threads at the beginning and end of you stitches long enough that you can grab onto them!

Fold your sleeve in half (right sides together) matching up underarm seams. Switch your machine back to a regular length stitch. Stitch down underarm seam, finish seam. Repeat on both sleeves.

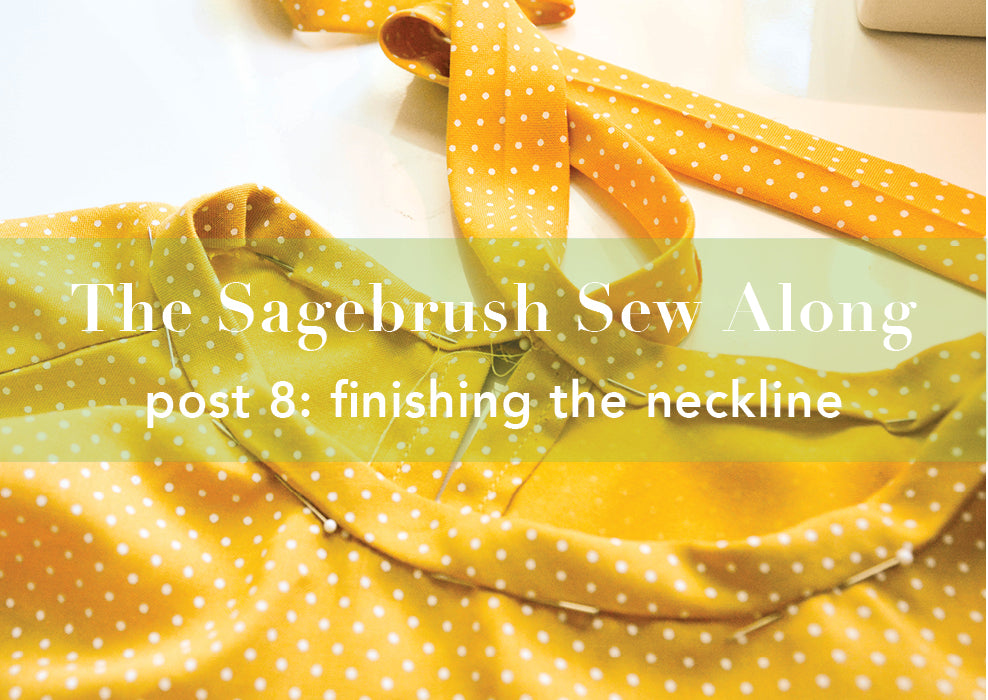
Now we will pin our sleeve to the body of our top! Turn your top inside out and keep your sleeve right side out. Slip your sleeve inside your top. In order to get the sleeve situated perfectly there are several points that need to match up:
- Match up underarm seams.
- The single notch at the cap of your sleeve should match up with your shoulder seam.
- The outer notches should match up with your yoke seams (the single notch with the front and the double notch with the back).
- Make sure the ruffle on your front is pinned downward and isn’t bunched.

Pull the bobbin strings on the gathering stitches on your sleeves. Gather your sleeves until they match the size of your armhole. Gathers should be concentrated at the shoulders. Add some extra pins to hold everything in place and stitch around the armhole. Finish seam, press. Repeat on the other sleeve.

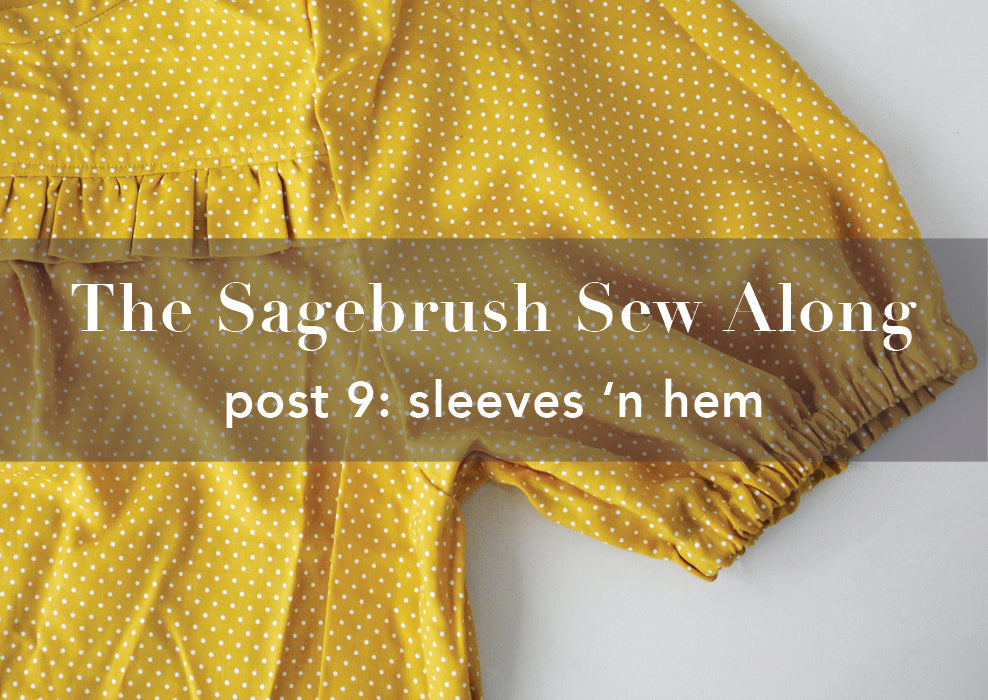
Now we move onto the sleeve hem. Fold the hem of your sleeve under 1/4” (.6 cm) and press. Fold it under another 3/4” (1.9 cm) and press/pin it in place. Stitch around the hem of your sleeve, 5/8” (1.6 cm) from the edge, leaving a 2” (5 cm) opening.

Take your length of sleeve elastic and attach a safety pin to the end.

Run it through the opening you left on your sleeve hem. Use the safety pin to inch the elastic around the sleeve hem.

Once I have scooched the elastic into the sleeve I like to put a pin through the end of the elastic to keep it from falling into the sleeve hem and getting lost.

Once the elasitc is fed all the way through, pin the ends together and carefully try it on. You can shorten the elastic or cut a new longer piece if you aren’t satisfied with the fit.

Make sure that the elastic hasn’t rolled or twisted inside your sleeve hem and then sew the ends together. Stitch the opening of your sleeve hem shut. Repeat on the other sleeve.

All that is left is to hem the top! The Sagebrush Top is designed to have a generous hem. It gives it a lux look and also makes it easy to adjust for different heights. Fold the hem of your top under 2” (5 cm) and press.

Fold it under another 2” (5 cm) and press/pin it in place. Stitch around the hem of your top 1/8” (.33 cm) from the folded edge (1.88”/4.8 cm up from the bottom edge of your top) securing your hem in place. This may be easier to sew with the wrong side of your top facing up.


Leave a comment
This site is protected by hCaptcha and the hCaptcha Privacy Policy and Terms of Service apply.