This blog post has been highly requested, with many asking the question 'how can I reduce the sleeve on the Sagebrush top'. Well, we are finally putting this to the test and showing what amends can be made in order to reduce the sleeve to make it less 'puffy'! Continue reading to find out more.

Preparation:
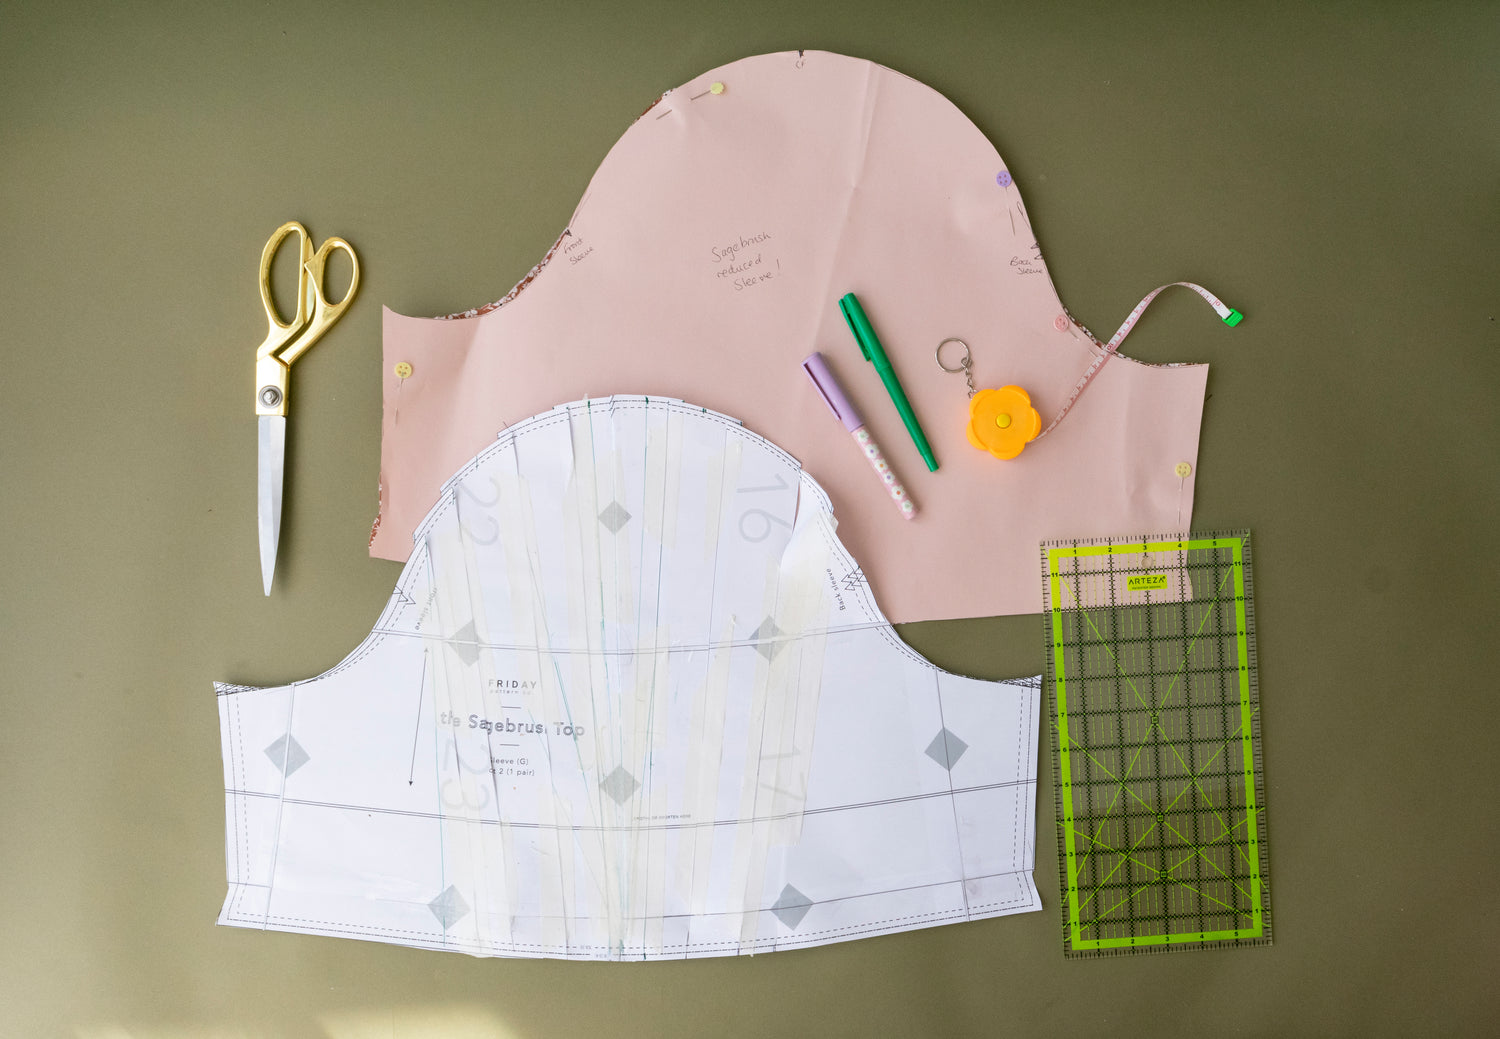
Firstly, you will need a fresh sleeve pattern piece, one you don't mind cutting into. I recommend re-printing the sleeve piece or tracing your current Sagebrush Sleeve, pre-cut in your required size.
For this amend you will need; a ruler (a quilting ruler is great because of the angled lines, but any ruler will do as well), a pen, tape measure, scissors, pattern paper (tracing paper) and tape. I used a big piece of pink card I had in my stash for this, so honestly use what you have it doesn't need to be anything fancy.
Step 1:

Measure the top of the sleeve pattern (the sleeve cap). I used a bit of string to follow the curve, on the 'stitch line' allowing for the 5/8"cm seam allowance then measured the bit of string - take note of the measurement. My measurement was 87cm (for a size medium top).
Step 2:


Do the same thing with your underarm measurement, laying the pattern pieces flat (like in the photo) I overlapped the patterns slightly to allow for the seam allowance. Using the string again, starting from the front yolk shoulder seam, round the front body underarm, to the back and then finishing at the back yolk shoulder seam - on the stitch line to allow for the 5/8"cm seam allowance. mark on the string with a pin or chalk then measure the string, take note of the measurement.
Step 3:

MATHS... yes, to some (including myself) maths is never my strong point. Fear not, this handy guide is how we worked this method out, so if at confused then read this article by 'In The Folds'.
You want to take the sleeve measurement in my case this was 87cm and subtract away the underarm measurement (55cm, yours will differ because of different sizes, I made a size medium for reference). So 87cm-55cm = 32cm. Now deduct another 1.2cm, this is to allow a little ease in the sleeve cap. You then divide your answer by the amount of sleeve 'slash lines' you're going to make. For this deduction I make 9 slash lines.. so the maths is:
32cm - 1.2cm = 30.8cm (I made this 30cm for easier maths).
30cm ÷ 9cm = 3.333cm
As you can see my maths made it quite confusing, I didn't want to reduce each slash line 3.33cm SO I narrowed this down to 2cm per slash line. This means there will still be a little 'puff' to the sleeve, but reduces the measurement from 87cm to 69cm.
To summarise, the new sleeve cap will be 69cm, to fit into the arm hole of 55cm.
Step 4:


Leave a comment
This site is protected by hCaptcha and the hCaptcha Privacy Policy and Terms of Service apply.