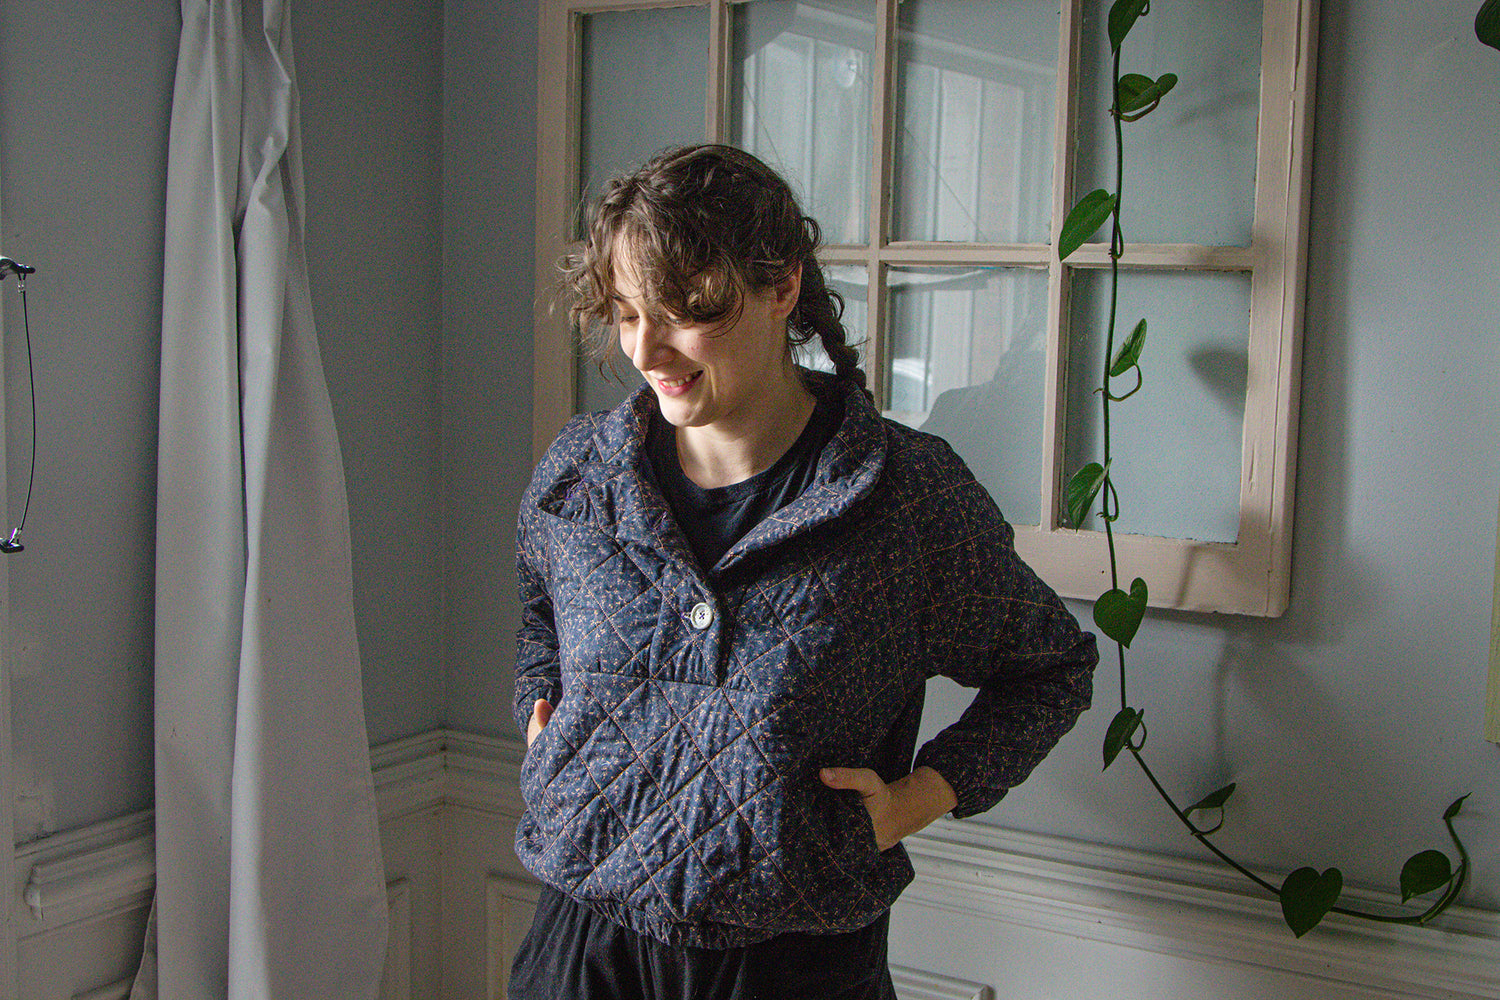
Quilting your fabric is a great way to not only add texture and interest to your garments, but also warmth for the cooler months. It’s quite a simple process (albeit a time-commitment) that can really elevate your me-mades and have people flagging you down to ask where you got your hands on such a cozy item! Today, I want to show you just how I transformed my Pogonip through quilting.
What you need:
- Main Fabric: Feel free to choose whatever sturdy, woven fabric that you fancy! I’d recommend opting for a light-medium weight material as you will be sewing 2-3 layers together to create your quilted fabric. If you choose too heavy a fabric as your main, sewing up your jacket might be a challenge/ become too stiff to wear.
- Cotton Batting: This is the material that gives your fabric that classic quilted look and loft (not to mention warmth!). Often, you can purchase this material by the yard or by a pre-cut size, most likely in the measurements appropriate for bedding.
- Lining Fabric: This is purely optional, but highly recommended, especially if you have sensitive skin (like me!). You already need lining material for your Pogonip but will need more to ensure the cotton batting doesn’t rub against your skin. Be sure to purchase the same amount of lining as you do for your main fabric.
- Chalk or fabric marking pen: Your usual method of marking on projects.
Method:
To start, press all three of your fabric layers separately. You want to make sure that everything is as wrinkle-free as possible to ensure your fabrics lie on top of one another properly. This is especially important when you go to cut out your pattern pieces.
Then, lay your lining fabric (if using) with the right side facing your cutting table followed by your cotton batting and then topped with your main fabric whose right side should be facing you. You should get something that looks a little like this:

Once all of your fabrics are set on top of one another and are smooth, you can begin to trace your pattern pieces onto your main fabric with your marking utensil. If you have loads of extra fabric it might be a good idea to space your pieces out a bit (more on that soon). I had just enough material to cut out all of my pieces, so I had to space my pieces relatively close to one another.
The pieces you will want to “quilt” together include the following: A, B, C, D, E, F, G, M. And because you are quilting each of these pieces, for D,F, and G, you can omit the fusible interfacing (especially if you are doing a “lining” bit as this material acts as a stable interfacing for these pieces.)

Once everything has been traced onto your main fabric, go ahead and pin around each of your pattern pieces, making sure that you catch all three layers. You want to be generous with your pins here as we don’t want our layers to shift at all.
Now, it’s time to cut! I tried to give myself as much “extra” fabric around each of my pattern pieces as I could, but as I mentioned before, I had very little material to work with, so this was a challenge. The reason I cut out this way (and suggested to space your pattern pieces if you had extra material to spare) is because when quilting, our fabric often shrinks inwards a bit. This happens because of the tension created by the thread catching our layers together. It is a minimal shrinkage, but having that little extra all the way round our pattern pieces can really help ensure we cut out the right size once all this quilting is completed.
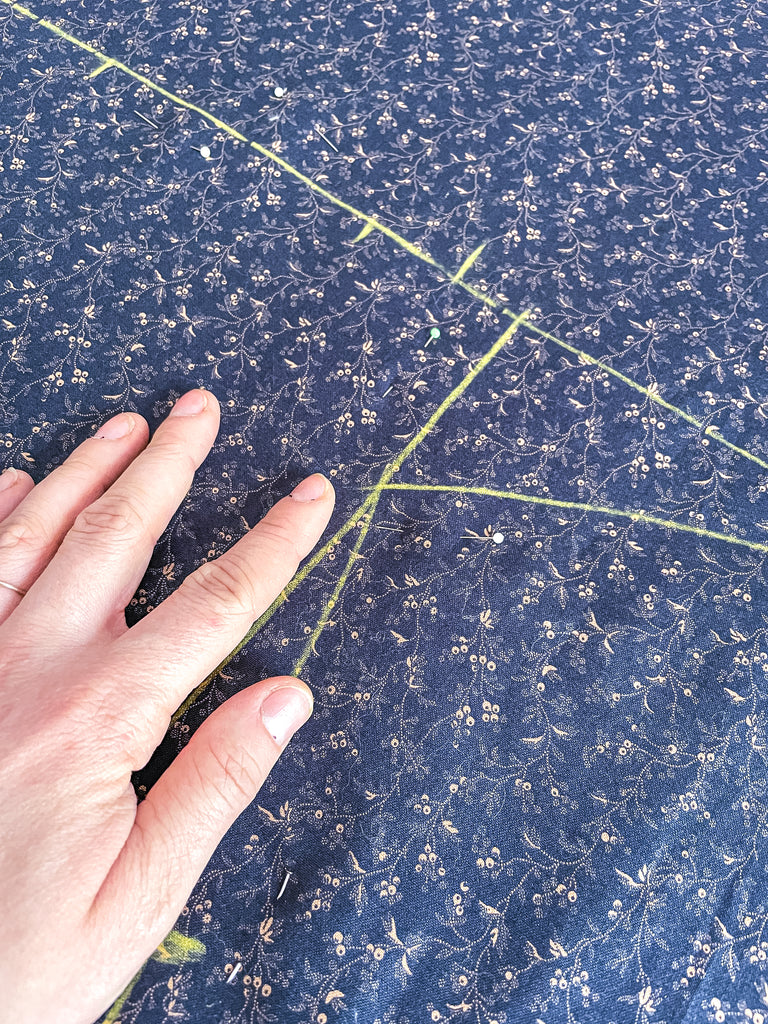
Before we get right into quilting, you may want to experiment with what kind of pattern you wish to sew. There are so many options! You can go for a classic diamond shape, keep it simple with straight lines, or test out something more organic!


In the end, I chose to do a simple, diamond shaped design. Each of my lines were set at a 45° angle and 2” (5cm) apart.


For some of my pattern pieces, I really wanted the quilting design to match, such as for the front piece (C). In order to do this, I made sure that I started both of my first line markings in the same spot on both pieces. For the front piece, this meant one line started right at the bottom corner of the under arm and the other at the bottom corner of the center front.

With all of your pieces marked, it’s time to begin sewing!

One of the biggest things I learned while quilting my pieces together was that pinning really did save me a lot of headache. I found that if I pinned all of my lines going in one direction and only removed the pins once I had gotten to them while sewing, this kept my fabric from stretching out of shape and causing pulls in the quilting.

With each piece quilted, it is now time to trim away any excess material. Grab your pattern piece and lay it on top of your newly quilted fabric to check that it hasn’t shrunk any. If it has, re-trace your pattern and then trim off the excess material surrounding it.


Amazing! You are now ready to sew up your elevated Pogonip Pullover! Welcome to the quilted jacket club.


Shop the Pogonip Pattern here.


Leave a comment
This site is protected by hCaptcha and the hCaptcha Privacy Policy and Terms of Service apply.