
The Adrianna Dress is a shift dress with a swingy a-line silhouette. It is a simple design that lends itself well to customization! Something several testers brought up was that they would love to see this dress with some definition at the waist.
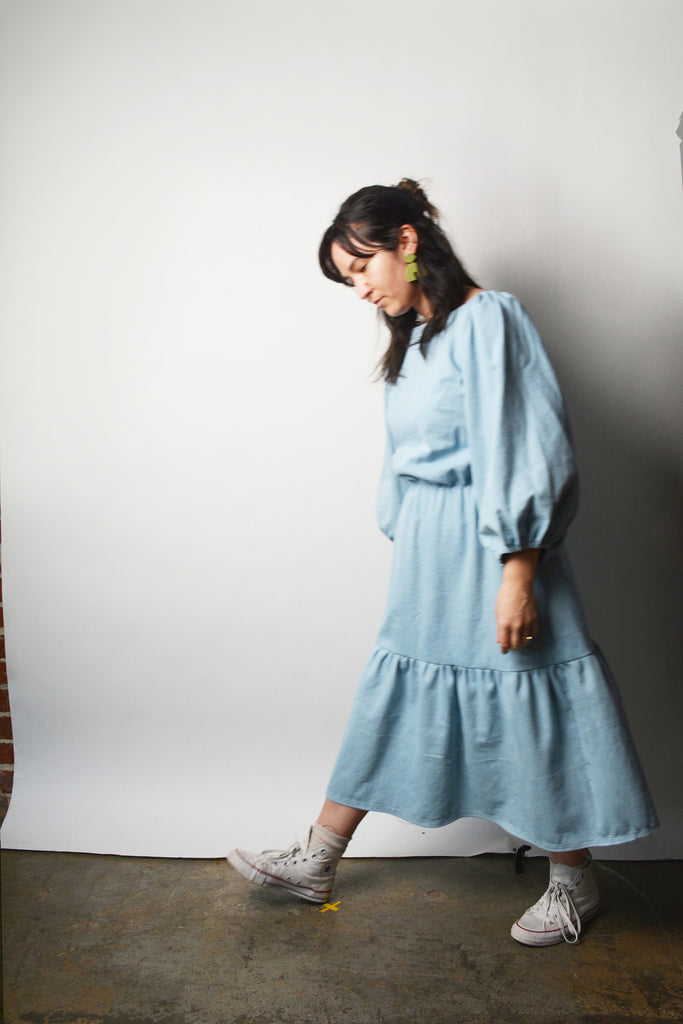
I decided to try making a version with elastic at the waist and I LOVE how it turned out. It has a very Ulla Johnson kind of structured modern vibe with a nod to vintage Laura Ashley. Anyway, this dress was made from a 10 oz 100% cotton denim. You can find the fabric here. The weight of the fabric makes it a STATEMENT. If you did this hack in a drapey fabric it has a totally different vibe. Check out this version that Victoria Lucille Anne made in a rayon challis!

To know before you sew:
- If you are adding a ruffle to the bottom you will need extra fabric. If you are looking to make a ruffle roughly the length and fullness of my denim dress, you will need an extra yard. I will break down how to calculate your ruffle later in this post, but wanted to give you a heads up.
- If you are adding elastic to the waist and are not adding a ruffle, consider adding a bit of length to the dress. Elastic waistbands pull up and settle on your natural waist so it will make your dress a little shorter.
- You will need an extra 1-1.5 yards (.9-1.4 meters) of .5-.75" (1.3-1.9 cm) wide elastic.
Let's get into it!
- Follow the instructions to make the dress. You won't need to hem the dress if you're adding a ruffle!
- Grab a length of elastic and tie it around your waist. You want it to be comfortable, but air on the side of slightly tight because the elastic will stretch as you sew it to your dress.


Let's just take a quick look at how my face looks when I'm pulling elastic around my waist.


- Once the elastic is around your waist, wiggle around to get it into a comfortable place.

- When you are happy with the placement add a few pins to mark the placement. Make sure you add a pin at the side seam.

- Carefully take the dress off and measure from the hem to your pins to see how far up the side seam the elastic should sit. On the wrong side of the fabric, use some sort of marking tool to mark that distance all the way around the waist of your dress. If for example your elastic should be 15" up. Start at the sideseam, measure up 15" and mark, move around the waist until you have drawn a line all the way around.
- Take the length of elastic for your waistband and sew it into a loop.
- Divide your waistband elastic into quarters by folding it in half and making marks at either end. Match those marks up and mark either end. You should have 4 marks on your elastic.
- Divide the waist of your dress into quarters by folding it in half and marking two ends. Match those marks up and add two more marks so that your waist is divided into equal quarters.
- Pin your elastic to the waist of your dress matching up the quartering marks on your elastic with the quartering marks on your waist.
- Use a zig zag stitch to stitch your elastic to your waist. You will need to stretch the elastic between your quartering marks so that the elastic is evenly distributed. Make sure to sew your elastic on top of the line that you marked around your waist!
Woo hoo! You have an elastic waistband. Now it's time to add a gathered tier.
- You'll need to calculate the dimensions of your gathered tier. Try on your dress and figure out how long you want the tier to be. Once you have your length, add in a seam and hem allowance. If you add 1.63" (4 cm) you will have a 5/8" seam allowance on top and then 1" for your hem.
- Now we figure out how full we want our tier to be. Measure the hem circumference of your dress. A lightly full tier would be that circumference x 1.5. If you want a full tier, take the circumference x 2. For example, if your hem circumference is 50", a lightly full tier would be 75" and a full tier would be 100". You are going to want to cut 2 long rectangles to make your gathered tier divide the number by 2 and add seam allowances.
You can also let how much fabric you have dictate how full/long your tier will be! Your gathered tier does not have to be any specific width or length.
- Once you have your desired width and length (don't forget to divide length by 2 so you can have a front and back piece), cut your panels out of fabric. If your fabric is rippable (a lot of woven fabrics are), try ripping out your rectangles!
- Right sides together, take your panels and stitch them together down the side seams (the shorter edges). Trim away excess, finish seams, press seams open.
- Fold your panels in half matching the side seams to find center front and center back. Mark center front and center back. Repeat this on the hem opening of your dress. These quartering marks will be matched up when you sew your gathered panel to your dress so that your gathering can be evenly distributed.
- Using a long straight stitch (recommended length 3.5-4 mm), stitch ¼” from the edge of your fabric around the top of your skirt. Sew a second line of long straight stitches 1/4” from your first row of stitches.
Side note: If you are working with heavy fabric you may need to use an alternative gathering method. After snapping a bunch of threads and getting seriously frustrated, I decided to try the zig-zag over a piece of ribbon method. Instead of sewing straight stitches, you set your machine to a wide zig zag and sew on top of a narrow piece of ribbon (without sewing into the ribbon). Then you can pull on the ribbon to gather your panel. I didn't have any ribbon on hand, I used embroidery floss and it worked great.

- Right sides together, pin your skirt to your dress matching up the quartering marks you made (side seams, center front, and center back). Pull on the bobbin strings of your long stitches to start gathering the skirt. Keep pulling until the waist opening is the same length as the opening of the hem of your bodice.
- Yay! Now all that is left is to hem the gathered tier! Do this in the manner of your choice. An easy way to do this is to fold under and press the bottom edge 1/2" and then fold the edge under 1/2" again. Stitch around hem.


47 comments
Leave a comment
This site is protected by hCaptcha and the hCaptcha Privacy Policy and Terms of Service apply.