

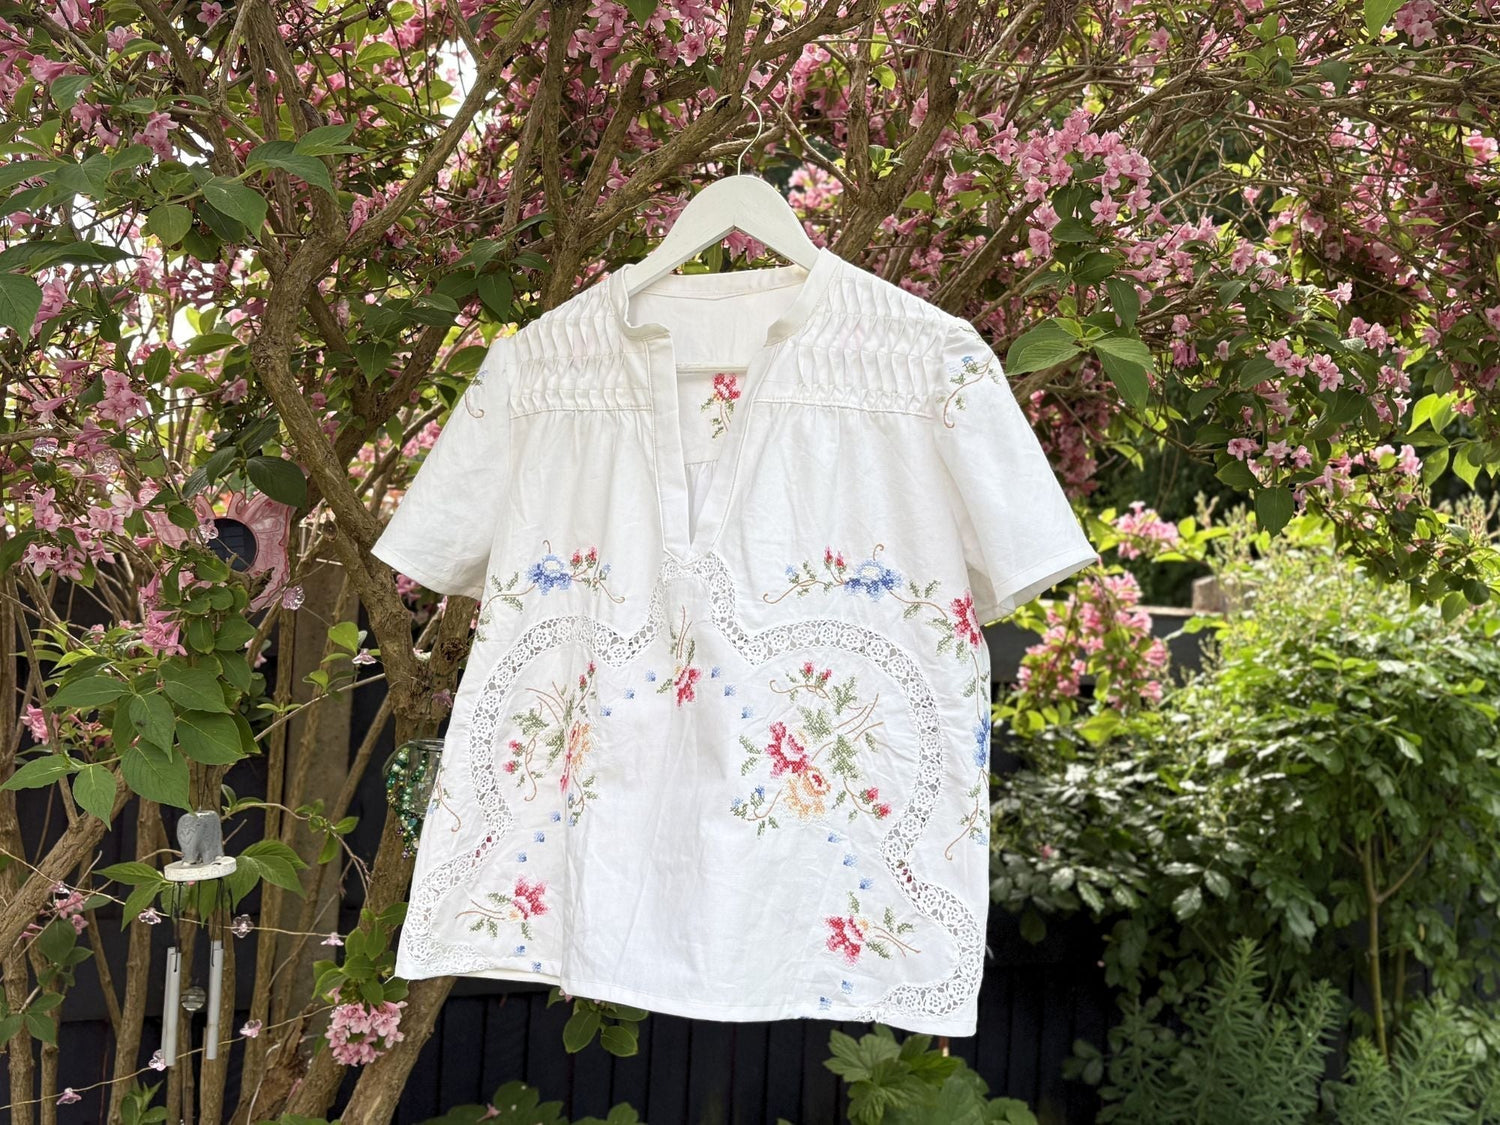
At Friday we love intricate and beautiful details on garments and taking the time to make something feel extra special. I saw some wonderful pin tuck blouses by Free People and other brands on Pinterest and felt inspired to create my own. Pin tucks are a technique that has been on my 'to sew' list for a while and I was always a bit intimidated to try them but they are a lot easier than they look! Continue reading to hack the Canyon top pattern and create pin tucks on the yoke front pieces.

What you need:
- Canyon Top and Dress Pattern
- Pattern drafting paper or scrap paper in large sizes
- Ruler
- Heat removable fabric pen
- All other sewing tools
- Glue or tape for paper
How to modify the yoke pieces:


On the front Yoke piece mark lines across the piece measuring 1 cm apart, leaving 3cm minimum on the centre front of the yoke (to prevent bulk when sewing on the placket it helps to keep this part flat). I chose to add 9 pin tucks to the yoke, which is quite a lot so you can add less if you want, but I think the more you add the more of a statement they make! This may also change depending on the size you cut out, so adjust the amount you want to add or take away depending on your preference and size.

Lay out a large piece of paper and draw a long straight line at the bottom. Cut each line you have drawn to section the piece out and stick them one piece at a time to the large piece of paper matching up the bottom edge to the line. In between each piece measure 1cm, draw a line in pencil and then stick the next piece against that line. Doing this increases the width of the Yoke to allow space to create the pin tucks!
Once each piece is stuck, you can either use a ruler or free hand re drawn the top edge, following the shape of the yoke but in between each pin tuck make the line straight. I found it useful to mark on the new hacked pattern piece which parts were pin tucks so I could visually see them to make it easier!

Cut the new pattern piece out of your fabric, you will need 2 of the new piece and 2 of the regular yoke pieces.
Using a heat removable fabric pen you want to transfer the lines onto the wrong side of the fabric, as these become the guide lines that you fold and stitch down. Either do this by folding the pattern back and drawing the line like that or pop a mark on the piece at the top and bottom of the line and then use a ruler directly on the fabric to draw them on.

Once they are cut the above image is what they should look like!
Sewing the pin tucks:
Wrong sides together starting at the outer edge, fold the first pin tuck by matching up the first 2 lines, each side of the pin tuck will be 0.5cm. Don't press because it will remove the lines, so instead finger press the lines to match and use a pin to make sure they're placed together correctly and the line on each side matches up. Use a regular straight stitch on your machine and sew that line following the guild line. Repeat this step with all 9 pin tucks and then give the piece a good press!


You can either leave the pin tucks like that and choose which way to press them, or add a little extra detail by stitching a few lines across all the pin tucks differing the direction each time to create a fun textured effect.

I measured the piece and worked out how I could add 4 lines, each one was about 1 inch apart. Press them in the direction you're going to stitch first, and sew 2 of the lines.
Press the pin tucks to the opposite side and then carefully stitch them whilst pushing them in the other direction. You can also baste stitch the bottom and top edge as well so that the pin tucks go in the right direction for sewing the yoke pieces.


Once they're done give them a good press and then sew the rest of the Canyon as per the instructions or video sew along! If you take your time and measure everything correctly then the standard yoke piece should match up perfectly to the newly pin tucked piece! It was so satisfying seeing my measurements work out and everything fitting together beautifully.

Once sewn together the finished result is truly beautiful! I think pin tucks work really well on a light or quilting weight cotton. Also having fabric that is plain rather than printed as it shows off the details of the pin tucks more than it would on a printed fabric!
If you follow along make sure to tag us on social media.
Shop the Canyon Top and Dress.
Follow me (Paige Joanna) on my personal account as well to see how I'll style it!

Pin tucks create such a lovely finish and alongside this vintage table cloth it really worked perfectly together.






Leave a comment
This site is protected by hCaptcha and the hCaptcha Privacy Policy and Terms of Service apply.